

JSON API mode: Automatically import and export chatbot data via webhook
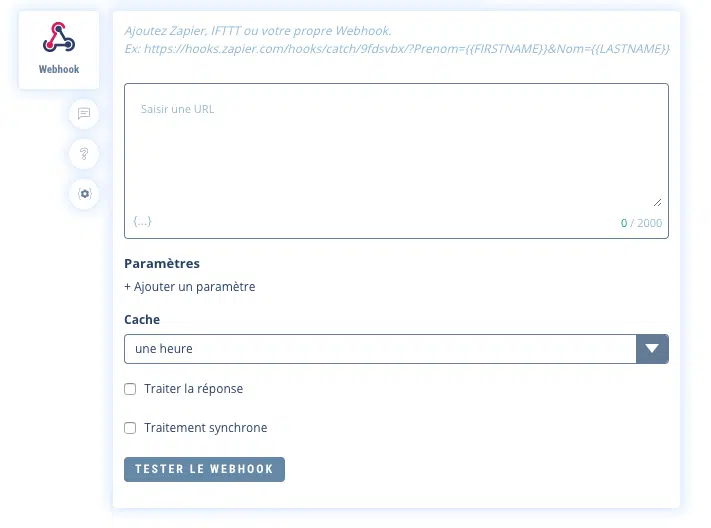
The Webhook element lets you import or export data to any external system: your own Webhook, Zapier, IFTTT or any other system that responds to the HTTP protocol.
1. Recommendations
Avoid overloading your chatbot with Webhook calls, as this can severely slow down your chatbot’s performance, as Botnation will be waiting for a service external to its infrastructure. Your Webhooks are then placed in a queue dedicated to your chatbot.
We therefore recommend that you only connect external services with instant response times via Webhook.
To do this, enter the URL of the service you wish to call. The url must be HTTPS (secure http).
You can add parameters either by adding them directly to the URL or by using the + Add parameter option.
The url will be called by Botnation AI in POST or GET. The header can be customized.
TIPS
If you want to be sure that the variable contains information before it is sent, you can test this by temporarily displaying a message just before the Webhook that displays the variable.
Your Webhook must always be located after data collection, not before, otherwise it has nothing to send!
2. Test your Webhook url
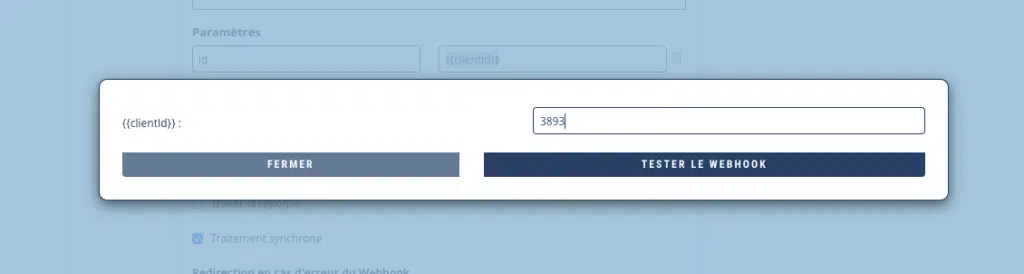
The “Test Webhook” button lets you call up the url you’ve entered to check that it’s working correctly.
If your url contains Botnation variables, you will need to simulate them by entering values in the associated fields:
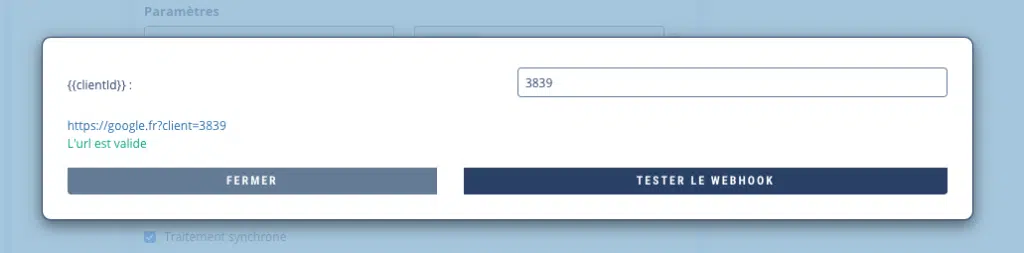
If the url is correct, a message will confirm this, otherwise an error will appear:
3. Synchronous processing” option
Synchronous processing puts the Chatbot on hold while your Webhook delivers a response. This is useful if one or more functions depend on a call to your Webhook.
For example, we have two Webhook functions one after the other:
- The Webhook A function executes a query to add a user to a database.
- The Webhook B function executes a query that retrieves the total number of users from the database and inserts it into a Botnation variable.
For the Chatbot to function correctly, it’s imperative that function A is fully executed before launching function B, otherwise an incorrect number of users will be obtained.
Using the “synchronous processing” option on function A, we ask the Chatbot to pause its execution for the duration of the request. As soon as the Webhook delivers a response, the Chatbot moves on to the next function, B.
This ensures that the order of the functions is respected when the Chatbot executes.
If the “synchronous processing” option is not checked, the Chatbot will not stop its execution, but will carry out the request in parallel.
In the event of a Webhook error
When processing is synchronous, you can select a redirection sequence in the event of a Webhook error:
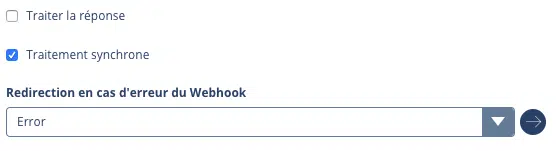
If your Webhook doesn’t respond or returns an error, the user will be redirected to the redirection sequence you’ve chosen.
4. Process JSON response” option
Only enable this option for very advanced webhook use. It may change your chatbot’s behavior if your webhook doesn’t respect the expected response format.
If you’re only collecting data, don’t activate this option.
For advanced use, the Webhook element can also read and process the response returned by the HTTP call.
This enables you, for example, to generate customized responses from data on your own servers. These responses can contain text messages, images, videos, audios, variables, buttons, etc…
Here are a few examples:
- Retrieve your latest news automatically, without having to integrate them daily “by hand” into your chatbot’s tree structure.
- Send a user’s city or collected GPS coordinates to your webhook, which sends back a message containing the 7-day weather forecast + a weather image generated by your system.
- Send to your webhook a user’s order number collected by the chatbot, which in response sends back the delivery status and changes the user’s variables.
- Send the title of a film requested by the user in your chatbot to your webhook, which connects to your database of millions of videos to send it a trailer without having to pre-program and download everything in your chatbot’s tree structure!
Your webhook must then respond within a few seconds (10), after which the connection to the webhook will be interrupted and any response cancelled.
When you choose to process the response, the “Synchronous processing” option will be automatically activated. Your chatbot will be on hold until your webhook has delivered a response, so bet on a server with a good connection and fast baselines.
If you’re going to retrieve non-personalized content (a news item) or content that can be reused by several users (the weather in the same city), you can cache your response to increase processing speed and limit calls to your webhook. This can last from a few minutes to several days.
You can use services like Zapier or IFFT which have pre-available webhooks connected to numerous external APIs like Salesforce, Mailchimp, Google etc…
The service must send a response in JSON format, encoded in UTF-8. Header content-type recommended: “application/json”
All responses must be formatted as follows:
{
    "botnation": "v1", // obligatoire pour que la réponse soit prise en compte
    "reply": [
         // contenu de la réponse (voir les nombreux exemples ci-dessous)
{
                        "type": "text",
                        "value": "Hello"
                }
    ]
}
We strongly advise you to use the https://jsonlint.com/ service to check the syntax and format of your JSON responses. It’s not uncommon to forget a comma or a brace, and the response will be cancelled.
Warning: the response must contain only the JSON file, nothing before, nothing after.
The JSON “reply [ ]” array can contain elements of various types (text, images, buttons, etc.) in a single reply.
Text
Displays simple text.
Example:
{
        "botnation": "v1",
        "reply": [{
                        "type": "text",
                        "value": "Hello World!"
                }
        ]
}
You can inject variables into a text value in the same way as for the Text elements in the interface. To do this, enclose your variable like this: {{variable}}. To find out more about variables, consult this article: All about {{…}} variables
Example:
{
        "botnation": "v1",
        "reply": [{
                        "type": "text",
                        "value": "Hello {{FIRSTNAME}} !"
                }
        ]
}
A delay between 2 elements
“value”: duration in seconds.
Example:
{
"botnation": "v1",
"reply": [{
"type": "text",
"value": "Hello World!"
},
{
"type": "delay",
"value": 5
},
{
"type": "text",
"value": "how are you?"
}
]
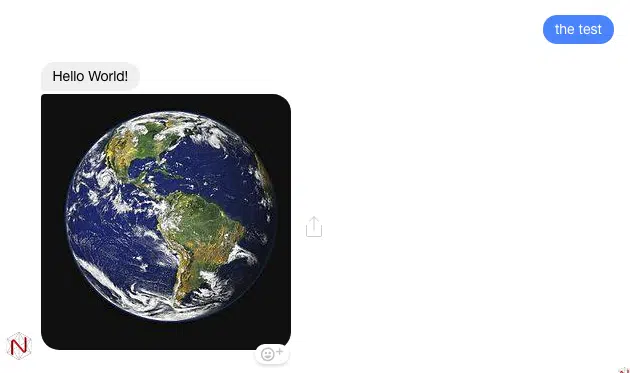
}Image, Video or Audio
Displays media (JPEG format recommended for images, MP4 for videos, MP3 for audio).
“type: image, video or audio
value: media url
Example:
{
        "botnation": "v1",
        "reply": [{
                        "type": "text",
                        "value": "Hello World!"
                },
                {
                        "type": "image",
                        "value": "https://upload.wikimedia.org/wikipedia/commons/thumb/d/db/Nasa_blue_marble.jpg/250px-Nasa_blue_marble.jpg"
                }
        ]
}
Set of Variables
Allows you to assign a value to a user variable.
“name”: “variable_name” (without spaces or special characters)
“value”: “string or value”.
In the bot, call this variable {{nom_de_la_variable}} .
You can create a new variable via this call, but the interface will eventually ask you to validate this variable so that it appears later in the interface menus.
To find out more about variables, see this article: All about {{…}} variables
Example:
{
        "botnation": "v1",
        "reply": [
                {
                        "type": "set",
                        "name": "who",
                        "value": "World"
                },
                {
                        "type": "text",
                        "value": "Hello {{who}}"
                }
        ]
}
for global variables {{%%varglob%%}} the syntax is: “type”: “set_gobal”.
For example:
{
        "botnation": "v1",
        "reply": [
                {
                        "type": "set_gobal",
                        "name": "phone",
                        "value": "+33175757575"
                },
                {
                        "type": "text",
                        "value": "Hello {{%%phone%%}}"
                }
        ]
}
Buttons and Quick Replies
Displays a list of buttons.
To display the buttons of a Story Button (3 buttons maximum):
{
    "type": "button",
    "value": "le texte à envoyer"
    "buttons": [button1, button2, button3]
}
To display the buttons of a Quick Reply Story (maximum 11 buttons with icon):
{
    "type": "quickreply",
    "value": "le texte à envoyer"
    "buttons": [button1, button2, button3]
}
Each of these buttons contains a next field which will redirect the user to a desired sequence. In this field, you must enter a redirection keyword defined in the AI module.
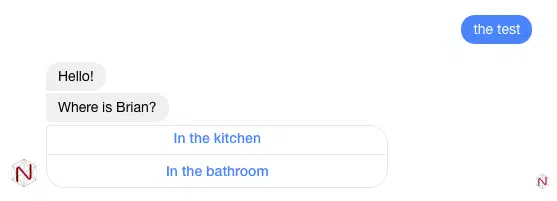
Buttons: Text with redirection
Example:
{
        "botnation": "v1",
        "reply": [{
                        "type": "text",
                        "value": "Hello!"
                },
                {
                        "type": "button",
                        "value": "Where is Brian?",
                        "buttons": [{
                                        "label": "In the kitchen",
                                        "type": "payload",
                                        "next": "kitchen"
                                },
                                {
                                        "label": "In the bathroom",
                                        "type": "payload",
                                        "next": "bathroom"
                                }
                        ]
                }
        ]
}
Buttons: Variable Set and Redirection
Example:
{
        "botnation": "v1",
        "reply": [{
                        "type": "text",
                        "value": "Hello!"
                },
                {
                        "type": "button",
                        "value": "What do you want to eat?",
                        "buttons": [
                                {
                                        "label": "A sandwich!",
                                        "type": "input",
                                        "name": "eat",
                                        "value": "sandwich",
                                        "next": "confirmation"
                                },
                                {
                                        "label": "A Cheeseburger ;)",
                                        "type": "input",
                                        "name": "eat",
                                        "value": "burger",
                                        "next": "confirmation"
                                }
                        ]
                }
        ]
}
Buttons: Open Website and Launch Phone Call
The ratio of the open webview can be :
- “compact”: site opens in a small system popup
- “tall”: site opens in a large system popup
- “full”: opens the site in a new tab
- “current”: open the site in the current tab
The telephone number must begin with the country code. ( +1 (USA), +33 (France), +48 (Poland) etc…)
Example:
{
        "botnation": "v1",
        "reply": [
                {
                        "type": "button",
                        "value": "Google or Phone Call?",
                        "buttons": [{
                                        "label": "Google",
                                        "type": "web_url",
                                         "ratio": "full",
                                        "url": "https://google.com"
                                },
                                {
                                        "label": "Call Me",
                                        "type": "phone_call",
                                        "value": "+33101010101"
                                }
                        ]
                }
        ]
}
Quick Replies with Geolocation.
Only on Facebook Messenger
Example:
{
        "botnation": "v1",
        "reply": [{
                        "type": "text",
                        "value": "Hello!"
                },
                {
                        "type": "quickreply",
                        "value": "Where are you?",
                        "buttons": [{
                                        "label": "Geolocation!",
                                        "type": "location",
                                        "next": "confirmation"
                                }]
                }
        ]
}
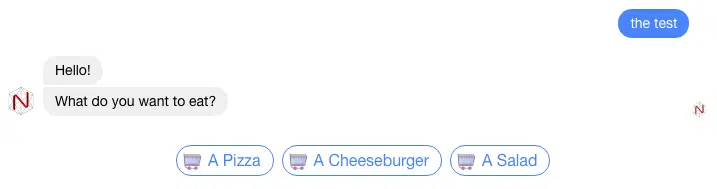
Quick Replies with Variable Set and Redirection and icon (“url”)
Example:
{
        "botnation": "v1",
        "reply": [{
                        "type": "text",
                        "value": "Hello!"
                },
                {
                        "type": "quickreply",
                        "value": "What do you want to eat?",
                        "buttons": [{
                                        "label": "A Pizza",
                                        "url": "https://png.icons8.com/dusk/540/shopping-cart.png",
                                        "type": "payload",
                                        "next": "pizza"
                                },
                                {
                                        "label": "A Cheeseburger",
                                        "url": "https://png.icons8.com/dusk/540/shopping-cart.png",
                                        "type": "payload",
                                        "next": "burger"
                                },
                                {
                                        "label": "A Salad",
                                        "url": "https://png.icons8.com/dusk/540/shopping-cart.png",
                                        "type": "input",
                                        "name": "eat",
                                        "value": "salad",
                                        "next": "confirmation"
                                }
                        ]
                }
        ]
}
For web chatbots, it’s also possible to indicate outgoing links.
For example:
                                {
                                        "label": "My Website",
                                        "url": "https://png.icons8.com/dusk/540/shopping-cart.png.webp",
                                        "type": "web_url",
                                        "web_url": "https://botnation.ai",
                                        "ratio": "full"
                                }
Generate a carousel
Carousels can contain several pages and several buttons, and each page may or may not have an image. Button syntax is similar to that of classic buttons (see above).
The image ratio must be declared in the header. “horizontal” or “square
Example of a 3-page carousel, the 3rd of which contains no image, with several button variants.
For example:
{
	"botnation": "v1",
	"reply": [{
		"type": "carousel",
		"ratio": "horizontal",
		"pages": [{
			"title": "Where is Brian?",
			"subtitle": "in the kitchen",
			"image": "https://i.pinimg.com/474x/c7/9b/2b/c79b2b537242b865188f172b346af5fc.jpg.webp",
			"link": "https://www.botnation.ai",
			"buttons": [{
				"label": "In the kitchen",
				"type": "redirect",
				"next": "kitchen"
			}, {
				"label": "Call Brian",
				"type": "phone_call",
				"next": "+33140506010"
			}]
		}, {
			"title": "Hello {{FIRSTNAME}}",
			"subtitle": "Powered by Botnation",
			"image": "https://cdn.searchenginejournal.com/wp-content/uploads/2017/05/bing-site-search-760x400.png.webp",
			"link": "https://www.botnation.ao",
			"buttons": [{
				"label": "Tell me more...",
				"type": "redirect",
				"next": "more"
			}, {
				"label": "Start {{LASTNAME}}",
				"type": "web_url",
				"url": "https://maboite.com"
			}]
		}, {
			"title": "One more time",
			"subtitle": "no picture?",
			"buttons": [{
				"label": "Test Input",
				"type": "input",
				"name": "MyVar",
				"value": "1234",
				"next": "next_one"
			}]
		}]
	}]
}
Simple redirection
Finally, if your Webhook collects data and simply needs to send the user to a confirmation message redirect, you can simulate keyword entry or indicate a blockId.
// by a keyword
            {
                        "type": "redirect",
                        "next": "etape_suivante"
             }
// with a blockid
       {
                        "type": "redirect",
                        "next": "590898d2abec169ef65fcc47"
          }
We strongly advise you to use the https://jsonlint.com/ service to check the syntax and format of your JSON responses. It’s not uncommon to forget a comma or a brace, and the response will not be taken into account.
Debug variables are available to help you manage webhooks.
- The HTTP status returned by your Webhook (remote server contacted). Only in “interpret response” mode is available in the variable: {{BN_WEBHOOK_STATUS}}
- The error message returned by your webhook or if the json transmitted in return is incorrect is available in the variable: {{BN_WEBHOOK_REASON}}
Feel free to display them in text messages.
