


Do you have an existing website and would like to create a chatbot from a URL?
Botnation can analyze your content and automatically generate a chatbot ready to answer your visitors’ questions.
Here’s how to do it.
How does creating a chatbot via URL work?
Botnation scans the pages of your website, extracts relevant content (text, FAQs, product descriptions, contact information, etc.), and automatically builds a chatbot capable of answering your users’ questions based on that content.
You can select the pages you want to add to your chatbot’s knowledge base one by one.
This is the fastest way to deploy a chatbot if you already have a fully functional and up-to-date website.
Video Tutorial: Create Your Chatbot with Our AI Assistant
Create a chatbot with a simple web address
Here’s a step-by-step guide to creating a chatbot
Step 1: Choose your distribution channel
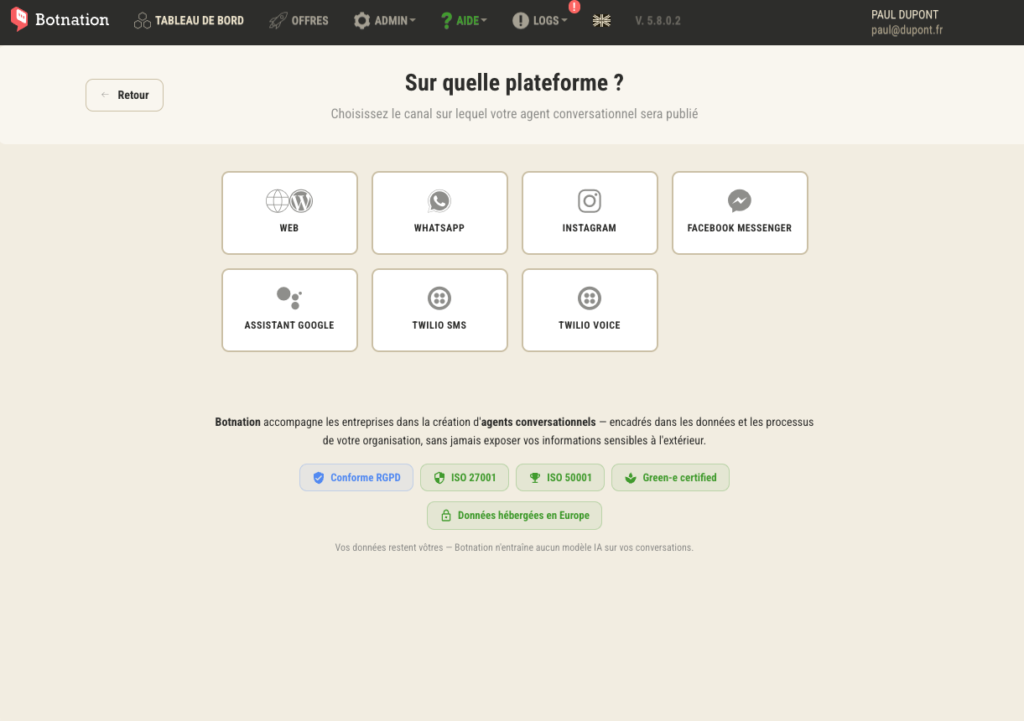
From your Botnation dashboard, click ” Create a New Chatbot,” then select the channel where you want to deploy your agent:
- 💻 Website
- 📘 Messenger
GOOD TO KNOW
The channel you choose determines your users’ conversation interface, but not the creation features. You can create the same type of bot on all available channels.
Step 2: Choose the type of chatbot
Botnation offers two operating modes:
- 100% conversational: Your chatbot responds in natural language, just like an AI assistant. Ideal for FAQs and customer support.
- Using a tree structure: Your bot guides the user through structured menus and buttons. Ideal for guided tours and product catalogs.
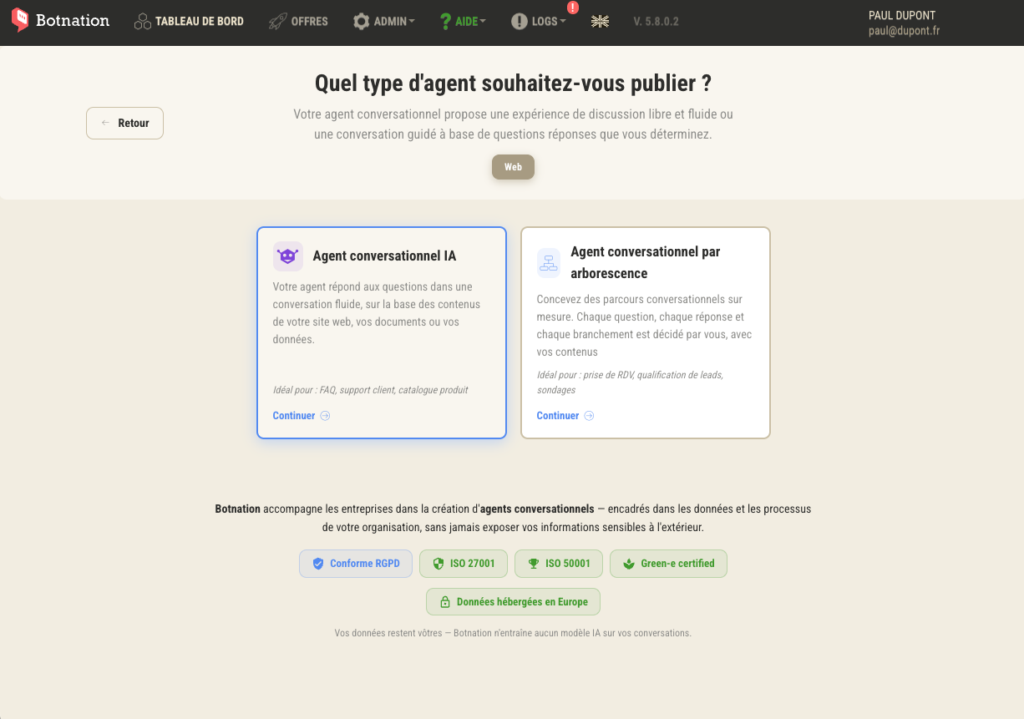
To create a bot via URL, select ” 100% Conversational,” then ” Support FAQ.”
Step 3: Choose the chatbot’s purpose
You can create an agent based on your text content, such as FAQs, or from a product catalog if you have an e-commerce site.
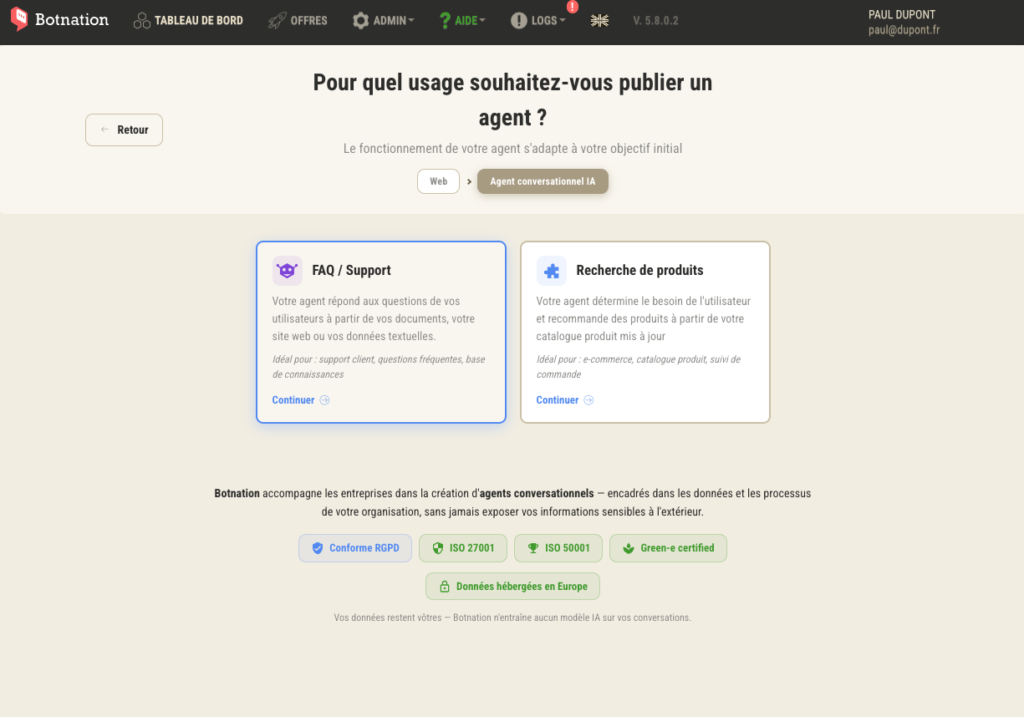
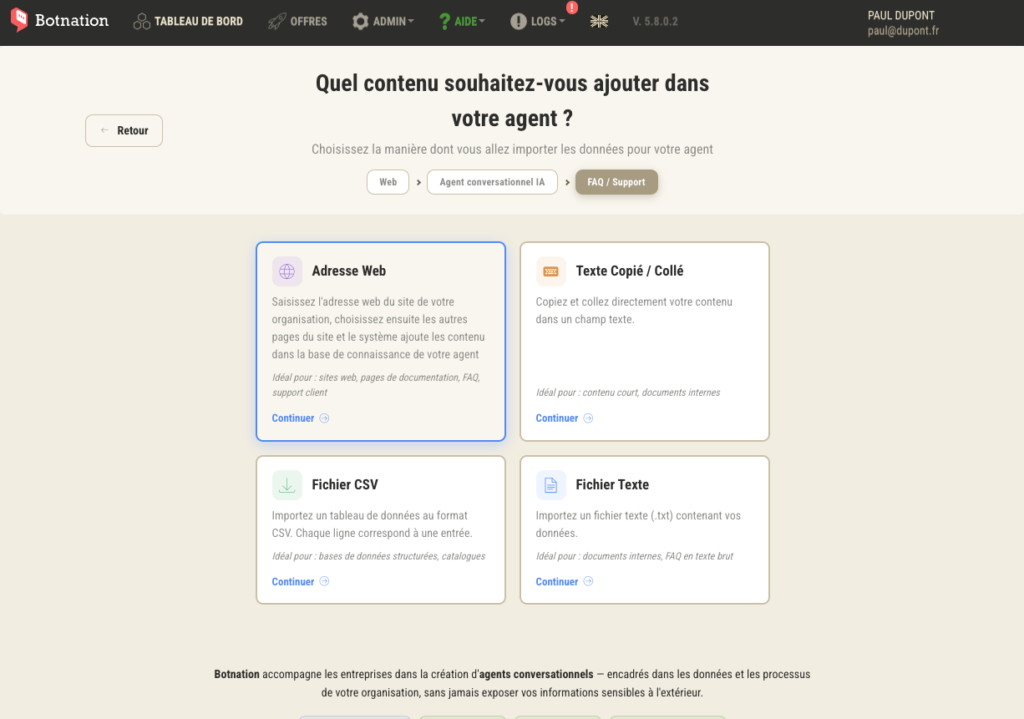
Step 4: Choose the source content for creating the chatbot
If you choose to build a chatbot based on text content such as FAQs, you will then be able to select the source of your content:
- Web address or URL
- Copied and pasted text
- CSV file
- Text File
Step 5: Enter your URL
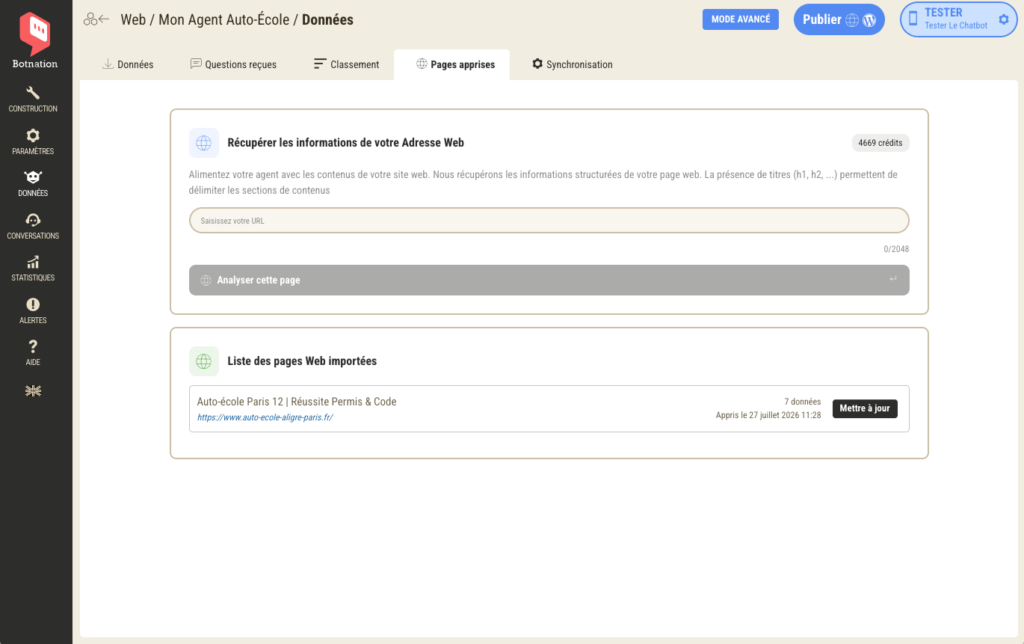
Enter your website address in the field provided.
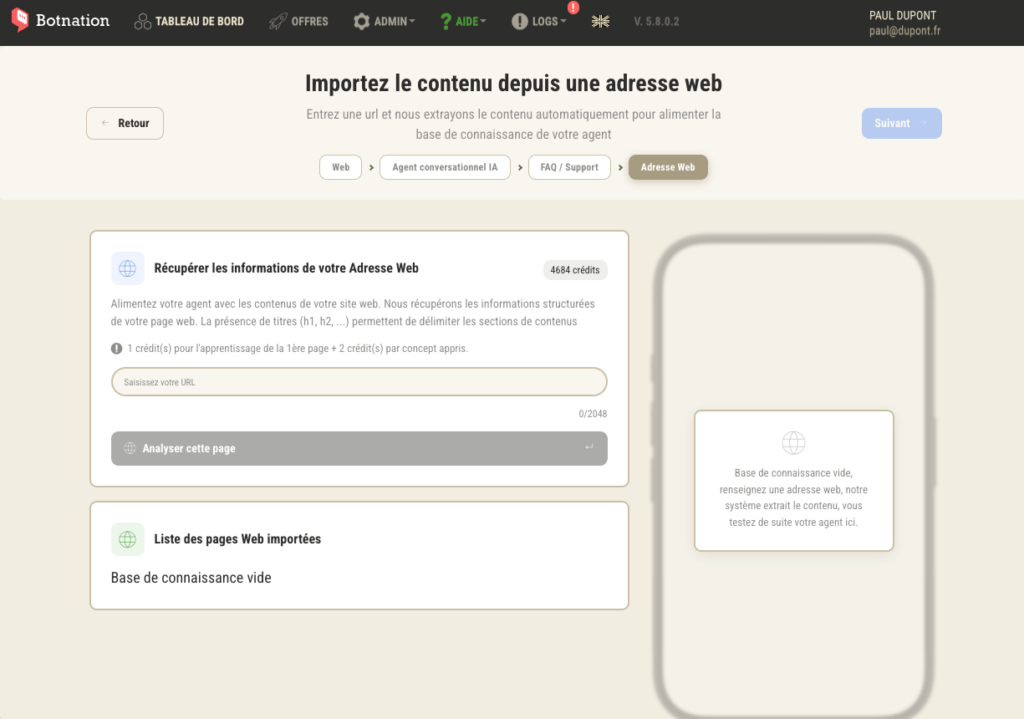
You can specify:
- Your homepage URL: Botnation will automatically crawl the linked pages
- The URL of a specific page: useful if you want to limit the knowledge base to a specific scope (an FAQ section, a product page, etc.)
Click ” Analyze ” and let Botnation do the work.
TIP
: The richer and more structured your site is, the better the results will be. If your content is scattered or lacks detail, supplement the analysis with the question-and-answer method after generation.
Step 4: Review and adjust the generated knowledge base
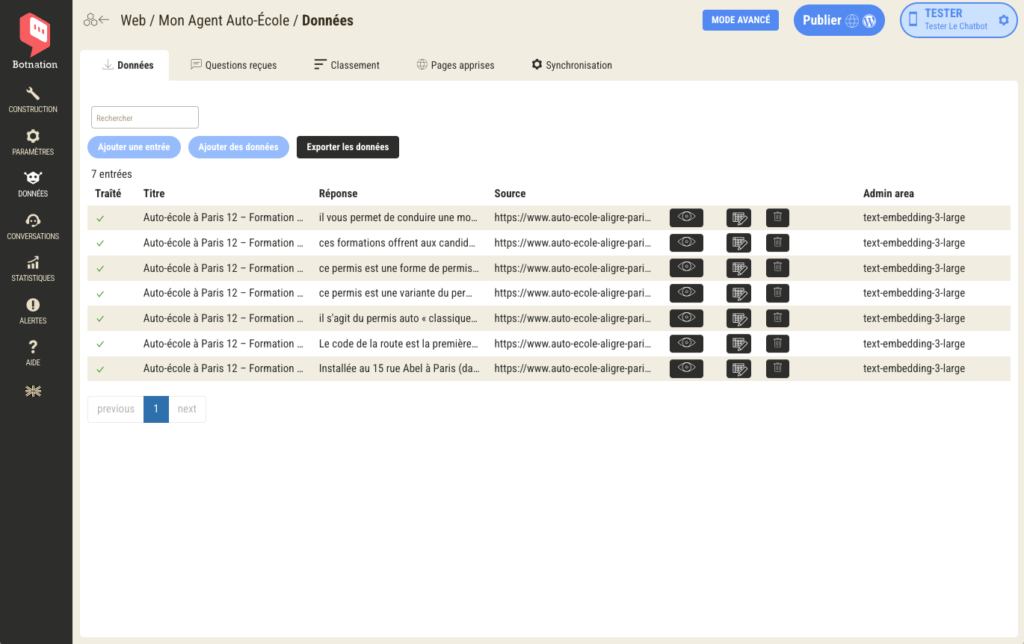
Once the analysis is complete, Botnation presents you with the knowledge base extracted from your site.
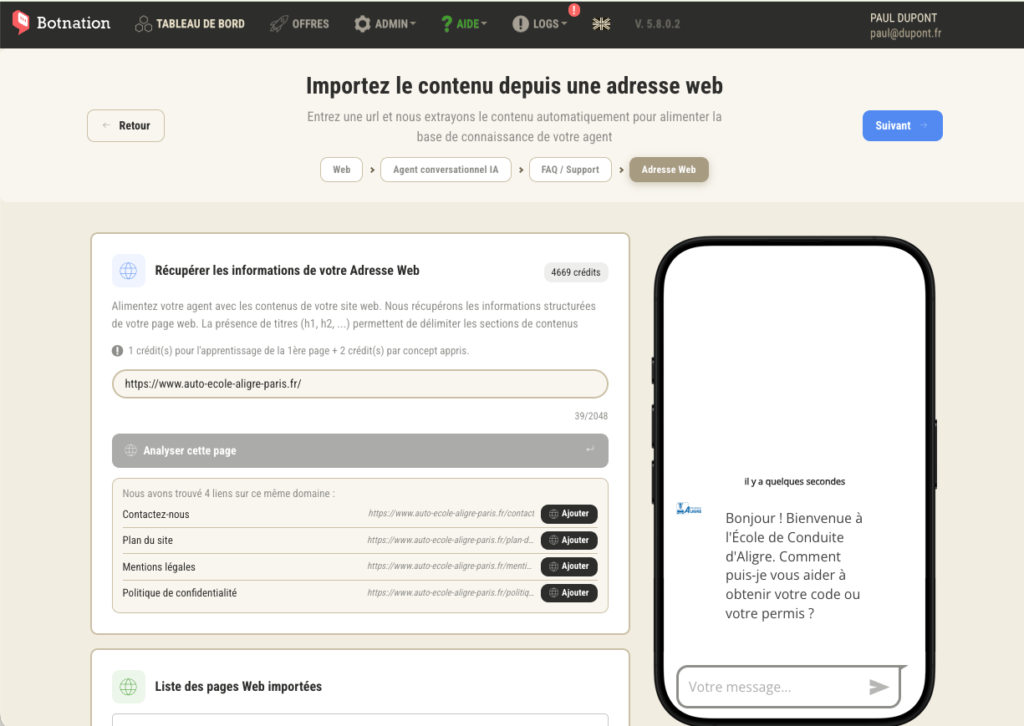
You can :
- Add new pages
- Select the retrieved pages
- Remove irrelevant items
- Manually add missing information
You can now test the chatbot, which already features your brand’s colors.
GOOD TO KNOW
This step is important. Take a few minutes to check the quality of the extracted content before confirming. An agent who is well-informed from the start will save you from having to make corrections later.
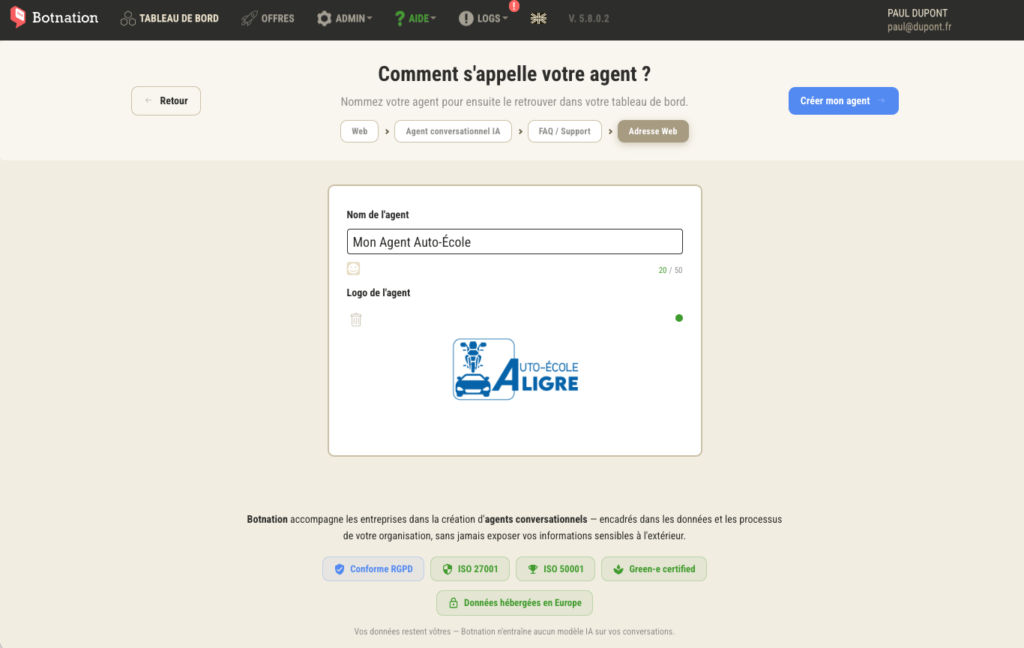
Step 5: Name and deploy your chatbot
Give your bot a name, confirm its creation, and go to your dashboard. Your chatbot is ready. All that’s left is to connect it to your channel and test it.
Step 6: Your chatbot is ready!
Congratulations! Your agent is now ready to be published.
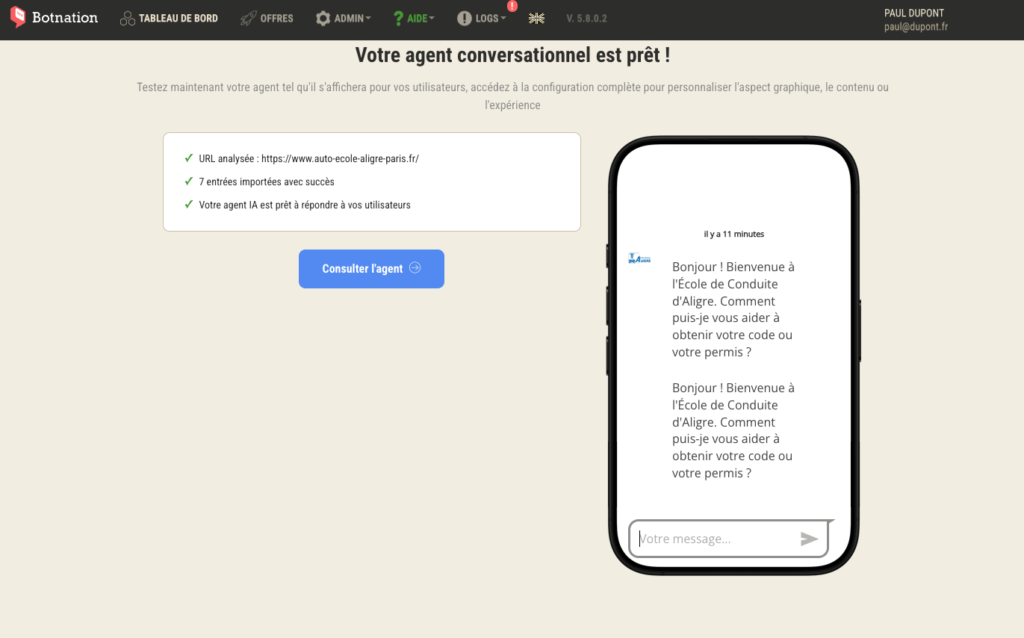
You can now test and then publish your agent.
At any time, you can access the content integrated into the chatbot, and add or remove pages and content from the knowledge base.