
Les premiers pas dans la création de chatbot : les bases de la construction
La création de votre premier chatbot peut paraître fastidieuse au premier abord. Cet article va vous permettre de prendre en main les bases de la construction de chatbot.
Nous allons ici nous intéresser au premier écran que vous voyez lorsque vous entrez en édition sur votre chatbot : la construction !
Voici à quoi devrait ressembler l’interface :
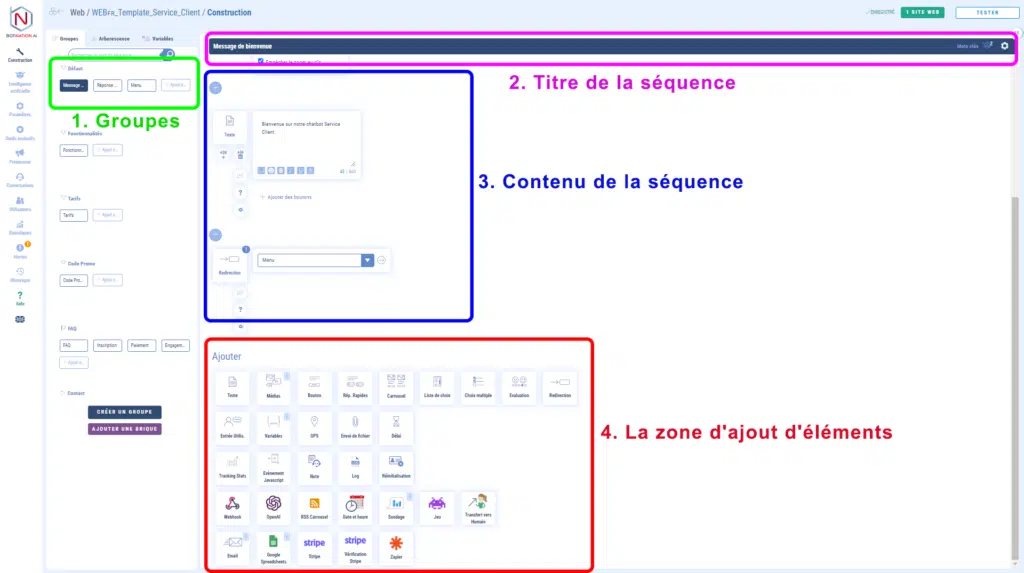
1 – Les groupes
La zone des groupes vous permet d’organiser vos séquences de manière logique. De la même manière que vous organisez vos fichiers dans des dossiers, vous pouvez organiser vos séquences dans des groupes. Cela n’aura aucune influence sur la manière dont votre chatbot va dialoguer avec vos utilisateurs.
Vous pourrez donc ajouter / renommer / supprimer un groupe et y affecter vos séquences. Il vous sera également possible de déplacer une séquence d’un groupe A à un groupe B en effectuant un glisser – déposer de cette séquence dans la partie des groupes.
2 – Le titre de la séquence
Afin de vous retrouver dans votre chatbot, nommez vos séquences de manière à ce que vous puissiez identifier son contenu rapidement. Le nom que vous donnez à vos séquence n’influera jamais sur la manière dont votre chatbot va dialoguer avec vos utilisateurs.
Tout à droite dans la zone de titre vous avez accès à des informations (le nombre de mots clés qui renvoient à cette séquence) et aux paramètres de la séquences (persona, contexte, etc.).
En plus :
– les paramètres d’une séquence (Chatbot Web)
– les paramètres d’une séquence (Messenger)
3 – Le contenu de la séquence
Cette zone est LA zone principale de la séquence ! C’est ici que vous allez définir comment votre chatbot va interagir avec vos interlocuteurs.
Une séquence est composée d’un enchaînement linéaire d’éléments que nous appelons éléments (rappelez vous de ce terme, vous le retrouverez de nombreuses fois dans la suite des articles). Ils seront traités de haut en bas.
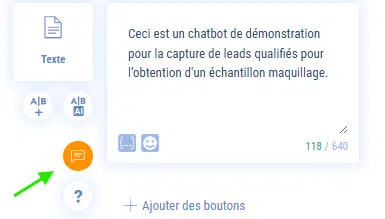
Vous pouvez par exemple envoyer un texte, puis une image, puis un texte, puis une vidéo, puis poser une question et attendre une réponse de la part de votre interlocuteur.
En passant votre curseur au dessus de la story, vous pourrez :
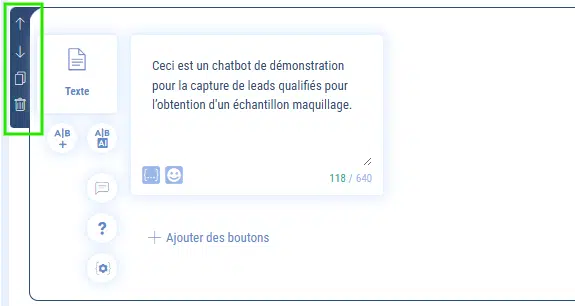
- déplacer votre story (vers le haut, vers le bas)
- la dupliquer
- la supprimer
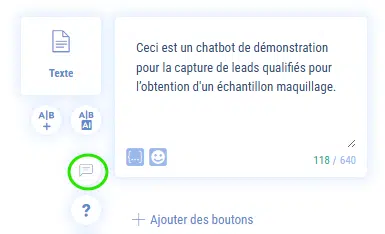
Les commentaires
Vous pouvez ajouter des commentaires sur chaque élément. Ceux-ci sont totalement indicatif et vous permettront d’ajouter des notes lors de la construction de votre chatbot pour vous ou vos collaborateurs qui ont accès à votre chatbot.
Vous y accédez en cliquant cette icône :
Un champ de saisi s’ouvrira alors pour que vous puissiez entrer votre commentaire :

Lorsqu’un commentaire a été saisi, l’icône devient orange :
Le mode rotation
Certains types de fonctionnalité proposeront ce mode. Il vous permet d’ajouter plusieurs éléments de même type (texte, image, vidéo, etc.) en rotation. Ils ne seront pas envoyés en même temps mais le moteur choisira en fonction du type de la rotation (linéaire ou aléatoire) un des éléments à envoyer à votre interlocuteur. C’est très intéressant pour rendre votre chatbot un peu plus humain !
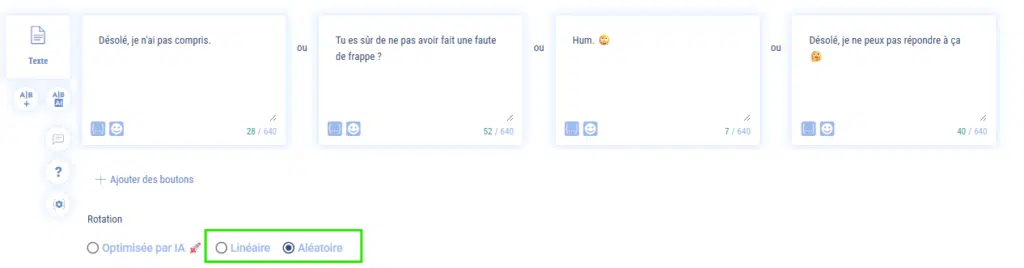
Si, par exemple, dans ma séquence j’ai 3 textes en rotation :
- Bonjour
- Salut
- Hello
Votre interlocuteur recevra la 1ère fois « Bonjour », la 2ème fois « Salut », la 3ème fois « Hello », la 4ème fois « Bonjour », et ainsi de suite.
Le mode rotation vous propose 2 options :
- linéaire : comme dans l’exemple ci-dessus, le moteur choisira l’élément 1, puis l’élément 2, puis 3, … jusqu’à ce qu’il revienne au 1er élément et ainsi de suite.
- aléatoire : le moteur choisira aléatoirement un élément dans la liste
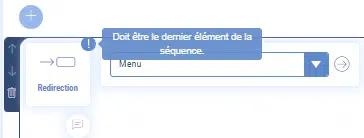
Les éléments de fin de séquence
Certains éléments devront obligatoirement se trouver en fin de séquence. Vous ne pourrez donc pas avoir d’éléments en dessous de celles-ci. Le meilleur exemple est celui de l’élément redirection qui vous permettra de lancer une autre séquence (pratique pour afficher un menu qui sera utilisé à plusieurs endroits de votre chatbot par exemple !).
Un indicateur en haut à droite de l’icône de la story vous l’indiquera.
4 – La zone d’ajout d’éléments
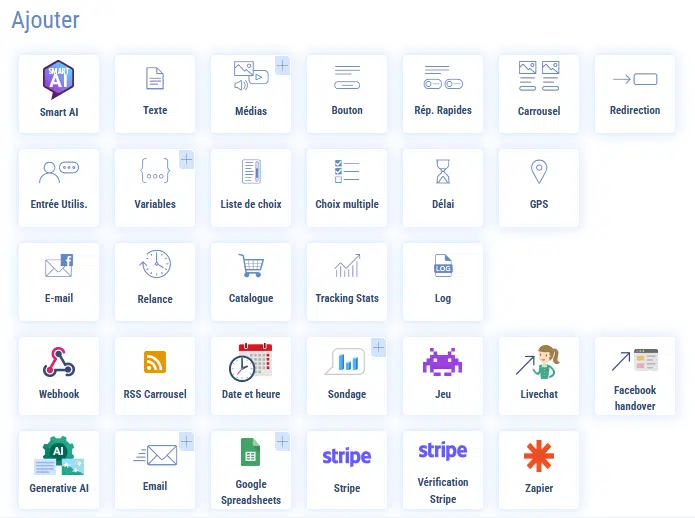
Cette zone vous permet d’ajouter des fonctionnalités à votre séquence.
Dans la majorité des cas, le nouvel élément sera ajouté en fin de séquence mais si votre séquence contient un élément qui doit obligatoirement être positionnée en fin de séquence, la nouvelle fonctionnalité ajoutée se retrouvera au dessus de celle-ci.
En plus :
– Formations en ligne