
Vous souhaitez connecter et activer votre bot avec votre page Facebook ?
C’est le grand jour, vous avez passé du temps à créer votre chatbot et à le tester.
Voici comment activer votre chatbot. La manipulation est simple et rapide (aucun besoin de savoir coder !), néanmoins, il y a des pré-requis et des choses à savoir.
A savoir :
• Un compte Facebook personnel peut être administrateur d’une ou plusieurs pages Facebook.
• Un chatbot Botnation peut gérer les discussions d’une page Facebook mais pas celles d’un compte personnel.
• Néanmoins, Botnation a besoin de lier un compte Facebook personnel qui est lui-même administrateur chez Facebook de la ou les page.s sur lesquelles vous souhaitez activer un chatbot.
• Il peut y avoir plusieurs administrateurs sur la page Facebook à lier. Dans le cas d’une page Facebook à lier pour un client, ce dernier doit vous nommer administrateur de sa page Facebook (c’est une contrainte imposée par Facebook).
• L’adresse email du compte Botnation peut être différente de celle du compte Facebook.
• Sur un compte Botnation, il ne peut y avoir qu’un seul compte Facebook lié, mais celui-ci peut être administrateur de X pages Facebook.
• Enfin, pensez à activer vos notifications Facebook sur le compte admin lorsque l’on vous nomme administrateur.rice d’une page : en effet, on vous nommera administrateur.rice et vous en serez notifié.e. Vous devrez ensuite accepter la demande.
Lançons-nous !
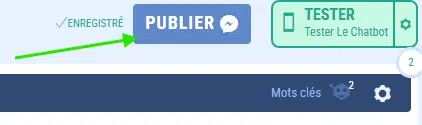
1 – Cliquez sur le bouton « Activer » (ou « enable » si vous êtes en anglais) dans le coin supérieur droit du tableau de bord :
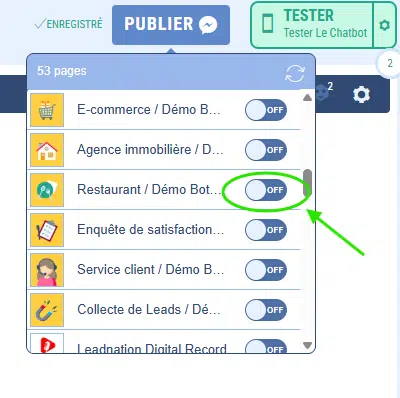
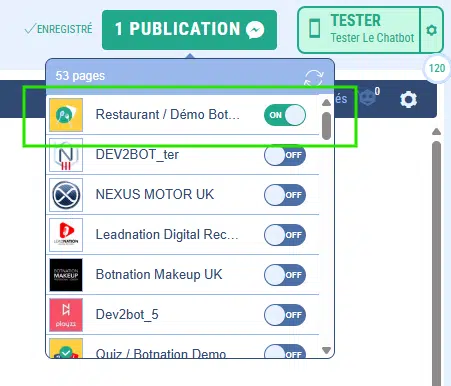
2- Sélectionnez la page Facebook sur laquelle vous souhaitez relier votre chatbot Messenger & cliquez sur « Activer » (ou « enable »).
3- Votre chatbot est activé sur votre page ! Félicitations. 👏
👀 à partir de maintenant le chatbot répond à 100% des messages reçus sur votre page Facebook.
🚒 un souci avec votre chatbot Facebook Messenger ? Besoin de le déconnecter ? C’est super facile. Sur l’écran juste au dessus, il suffit de cliquer sur « désactiver » (ou « disable »)