
En quelques minutes, exportez et adaptez votre chatbot Facebook Messenger pour en faire un chatbot pour votre site web.
Nous vous rapportions récemment que Facebook dégrade (temporairement ?) son expérience sur les chatbots Facebook Messenger. Pour plus de renseignements à ce sujet, veuillez consulter notre article détaillé.
Vous aviez travaillé dur sur un chatbot Facebook parfait qui répondait à tous vos besoins ? Pas de panique, le travail n’est pas perdu ! Nous allons voir comment le valoriser pour votre site web en quelques minutes. Certaines fonctions sont inhérentes à Facebook Messenger, nous verrons également comment les répliquer sur un chatbot web.
1. Exporter son chatbot Facebook Messenger
Vous avez remarqué que votre espace Botnation comporte plusieurs onglets correspondant aux plateformes sur lesquelles vos chatbots sont présents. En ce qui nous concerne, nous nous focaliserons sur les onglets Facebook et Web & WordPress :
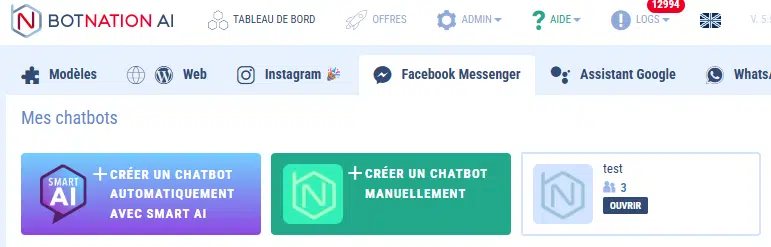
Rendez-vous donc sur l’onglet Facebook Messenger où se trouve votre chatbot actuel. Le but de l’opération est de l’exporter pour qu’il soit compatible avec votre site web.
Passez le curseur de la souris sur le nom de votre chatbot Facebook Messenger :
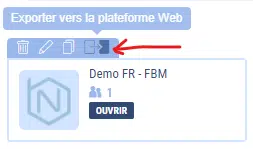
Un bandeau apparaîtra sur lequel 4 options s’affichent (Renommer / Dupliquer / Migrer / Archiver). Choisissez l’option « Migrer ». Un message d’avertissement apparaît, confirmez l’opération en cliquant sur « Migrer » :
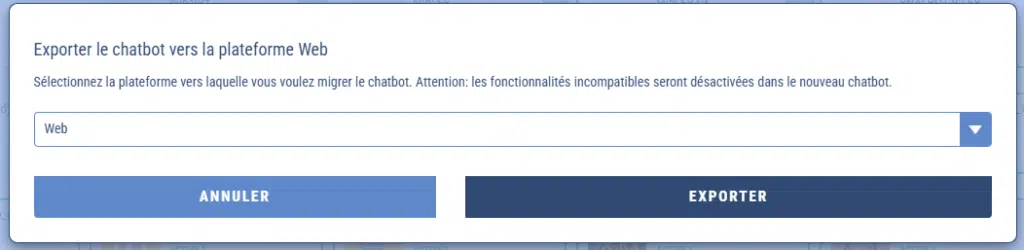
Maintenant, votre copie du chatbot est présente sur l’onglet Web & WordPress et est dorénavant compatible avec une intégration sur un site web. Il ne vous reste qu’à le mettre à niveau pour conserver les fonctions de départ.
2. Adapter son chatbot
Maintenant que vous avez réalisé la migration, il vous faut vérifier que tout fonctionne correctement. Pour cela, un tour rapide suffit. Cependant, certaines variables et fonctions ne marchent que sur Facebook Messenger. Voici quelques pistes pour contourner cela.
Récupérer facilement un email et un numéro de téléphone
Cet article vous explique comment récupérer un email et un numéro de téléphone rapidement sur Facebook Messenger via des variables dédiées. Il ne sera logiquement plus possible d’utiliser les variables Facebook. En revanche, la fonction Entrée utilisateurs vous sera très utile.
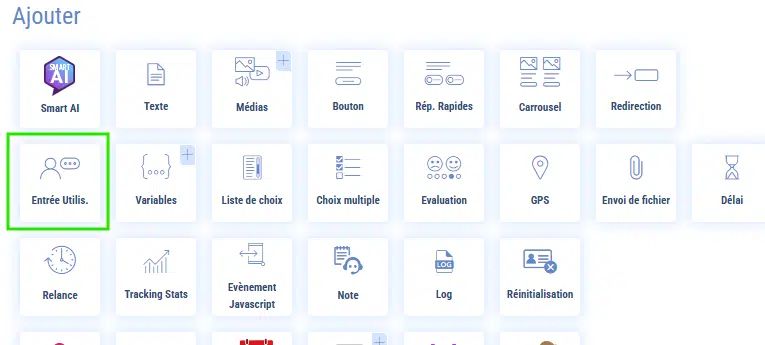
En configurant le module, vous verrez 3 options dans le menu déroulant « Type de variable » :
1) Texte libre
2) Détection de nombres
3) Détection d’email
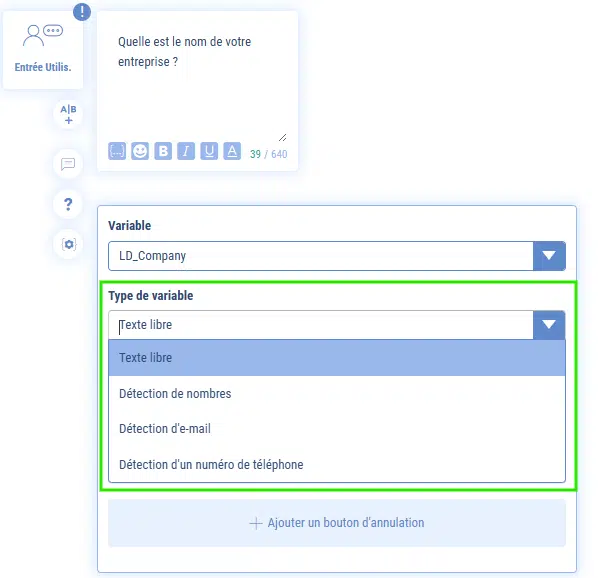
Les 2 dernières vous seront utiles pour vos formulaires et la prise de coordonnées. Par exemple, choisissez détection de nombres pour le numéro de téléphone de votre utilisateur. Ce dernier devra obligatoirement entrer une série de chiffres pour valider la réponse. Autrement, il lui sera proposé d’écrire de nouveau sa réponse. Idem pour la détection d’email : Botnation reconnaîtra la présence d’un « @ ». Si ce n’est pas le cas, l’outil proposera de taper de nouveau la réponse. Cela maximisera le nombre de formulaires avec de bonnes réponses.
Autres variables (nom, prénom, genre, langue…)
Facebook facilite grandement la personnalisation du chatbot grâce aux informations déclarées au géant américain lors de l’inscription. Ces informations peuvent être transmises via les variables systèmes et restituer dans le chatbot. C’est pourquoi, certains chatbots annoncent dès le début de la conversation « Bonjour Cyprien », Cyprien étant la valeur de la variable envoyée par Facebook. Si vous souhaitez personnaliser le parcours, vous pouvez en revanche demander à l’utilisateur lors de son premier passage son prénom et le restituer lors de ses prochaines connexions.
Pour ce faire, créez 2 messages de bienvenue. Le premier demandera via une Entrée utilisateur le prénom de la personne et le capturera dans une variable utilisateurs. Dans le second, vous intégrerez la variable en question avec une phrase du type : « Bonjour {{PRENOM}}, ravi de vous revoir ».
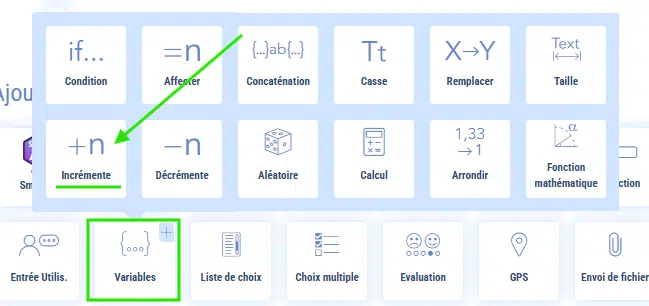
Astuce : Pour différencier les 2 messages, il vous faut utiliser une fonction incrémenter en fin de séquence, disponible dans le module « Variables »
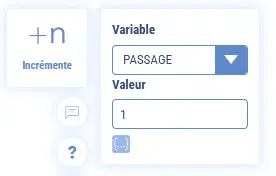
Créez une variable nommée {{PASSAGE}} par exemple. Lorsque l’utilisateur se rendra dans le chatbot, le premier message de bienvenue par défaut s’affichera. Le chatbot ajoutera « +1 » à chaque passage sur cette séquence.
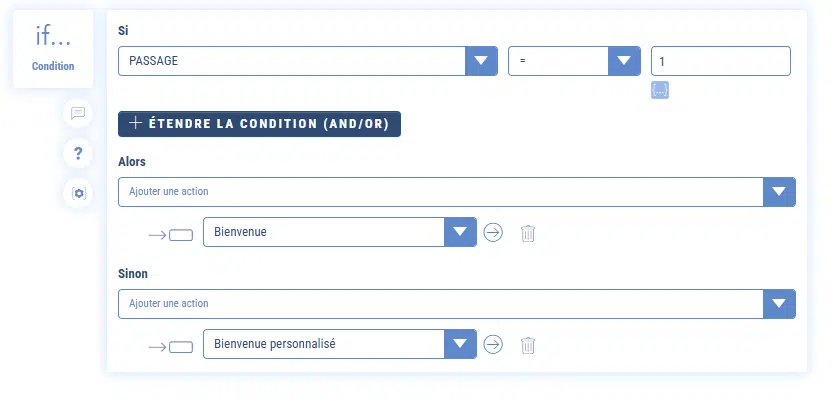
Au début du premier message de bienvenue, nous allons intégrer une sorte de péage qui comptera les passages des utilisateurs. Si c’est son premier passage, alors la séquence se déroule normalement et sa variable {{PASSAGE}} prend un point (+1). Lors de son second passage, on lui attribuera un second point, la variable {{PASSAGE}} sera alors égale à 2. Si la variable est strictement supérieure à 1, alors nous renverrons vers le second message de bienvenue personnalisé avec le prénom de l’utilisateur.
Voici une façon de paramétrer cela, la séquence « Welcome » étant le message de bienvenue par défaut, « Welcome personnalisé » le message personnalisé.
Ainsi, l’utilisateur retrouvera une expérience similaire à un chatbot Facebook Messenger.
La même logique est à appliquer aux autres variables de base comme Gender et Language : construisez votre chatbot de façon à demander directement ces informations à vos utilisateurs, capturez les dans des variables et restituez-les lors du retour de vos utilisateurs.
Quelles fonctions disparaissent à l’export ?
Via un site web, il ne sera plus possible de :
- relancer les utilisateurs ayant arrêté le formulaire
- envoyer des notifications (donc s’abonner ou désabonner à ces dernières)
- répondre automatiquement aux commentaires Facebook, en toute logique
C’est pourquoi nous vous conseillons de récupérer les coordonnées de vos utilisateurs en fin de discussion pour les recontacter plus tard. Ces données sont exportables par mail via le module Gmail, sur un Google Sheet via l’option dédiée ou vers toute base de données grâce au connecteur natif Zapier par exemple.
Comment faire si vous n’avez pas de site web ?
Notre service Chatbotnation sera votre allié ! En quelques clics seulement, vous pouvez héberger votre chatbot sur nos serveurs, le chatbot sera accessible en plein écran via un URL dédié sous la forme https://chatbotnation.com/votreurl. Si vous disposez déjà d’un nom de domaine mais pas d’un site, il vous suffira d’opérer une redirection depuis ce nom de domaine vers le chatbotnation.com. Ainsi, le chatbot pourra être publié.
En plus :
– Nouvelles règles de notification Facebook
– Récupérer un email et un numéro de téléphone sur un chatbot Facebook Messenger
– Tout savoir sur les variables
– Chatbotnation