
Facebook Messenger chatbots allow you to easily retrieve an email. We present you the best practices.
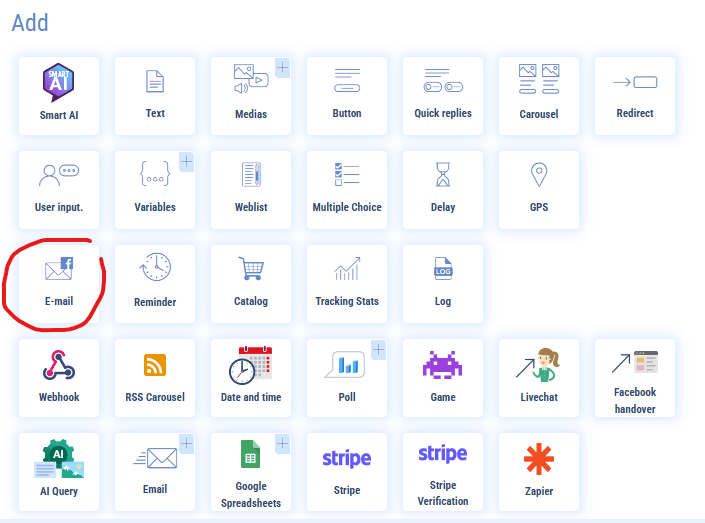
The Facebook Messenger chatbot makes it easy for you to collect leads. Indeed, you have probably already noticed that the Facebook module has options that web chatbots do not have, such as those circled in red:
Introduction to email collection via a Facebook Messenger chatbot
If you discover it (and there’s no harm done!), it’s used to capture the email declared by your user on Facebook. Indeed, to exchange with a Facebook Messenger chatbot, it is necessary to be connected to a Facebook account. When creating this account, you will be asked to declare an email address that is included in your Facebook profile. In the platform settings, you then set your privacy preferences.
How does Facebook email collection materialize on Botnation AI?
Let’s take a concrete example: in your chatbot, you insert a 2-step form aiming at collecting the username and email of your prospect. For the first question, you will use the System variable {{USERNAME}} which will allow you to collect the name declared by the user when he/she registered to Facebook. Let’s look at the rest.
Email collection via the Facebook module
After clicking on the corresponding icon, the module configuration will appear as follows:
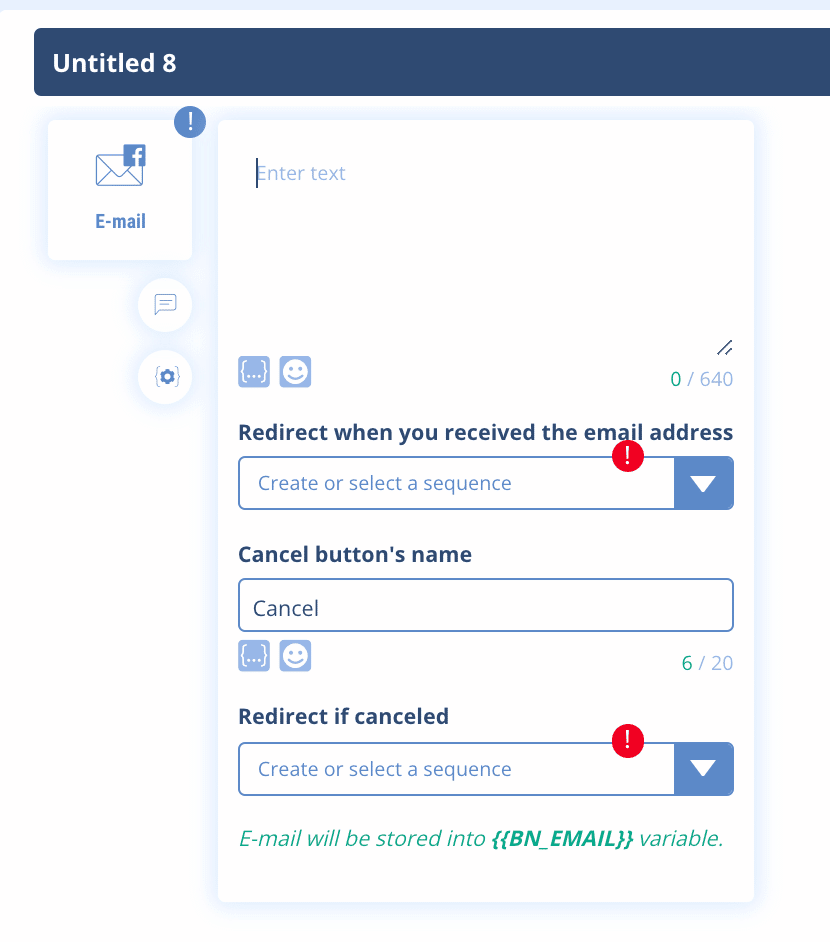
All you have to do is decide on a redirection sequence when the email is retrieved under the {{BN_EMAIL}} variable. Also, give the user the option of not responding by offering a cancel button. Here we have indicated that the button would be called “Cancel”. Also, indicate where this button will redirect (for example, to the phone number retrieval). Thus, the user has 2 options:
1) Click on the email declared via Facebook that you can retrieve
2) Choose cancel and you will not get the person’s email back. This is a shame, and we will explain below how to avoid this situation!
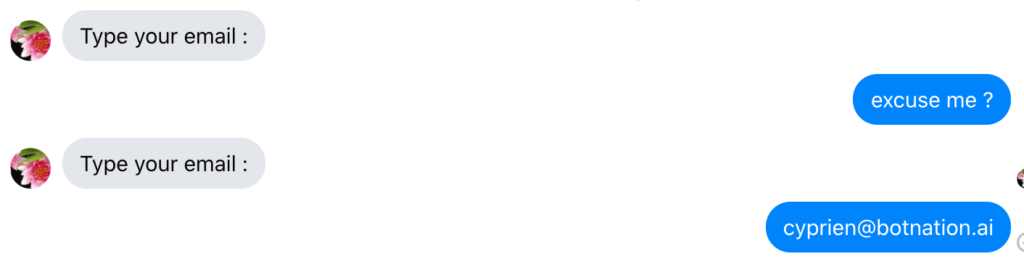
Here’s how the dialog window looks on the user side (use the Test button at the top right to see where you are in real time):
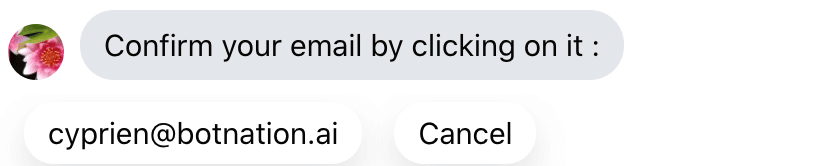
I can see that it is my Facebook username and the email I declared on the social network.
Problem solving
Offer your users to fill in an alternative email.
It is common to have several email addresses or Facebook accounts to meet personal or professional needs or simply to manage data on the Internet.
To avoid wasting information in this type of form, we advise you to offer an alternative to your users by giving them the possibility to fill in another email address than the one declared in Facebook. The interests are numerous:
- Your users do not feel compelled to give a personal email address
- Your users give an email address that they consult regularly
- They can choose on which email address to be contacted according to the service
How to do this? We will leverage the cancel option by adding an intermediate sequence that asks to add an alternative email.
It’s very easy, but don’t get lost in the editing! We advise you to follow step by step what we do here or to draw the tree structure (on free paper, it helps more than you think).
Repeat the sequence where you ask your user to fill in his email. Explain that they can 1) Click on the email that appears to confirm it 2) Choose to enter another email. Here is our example:
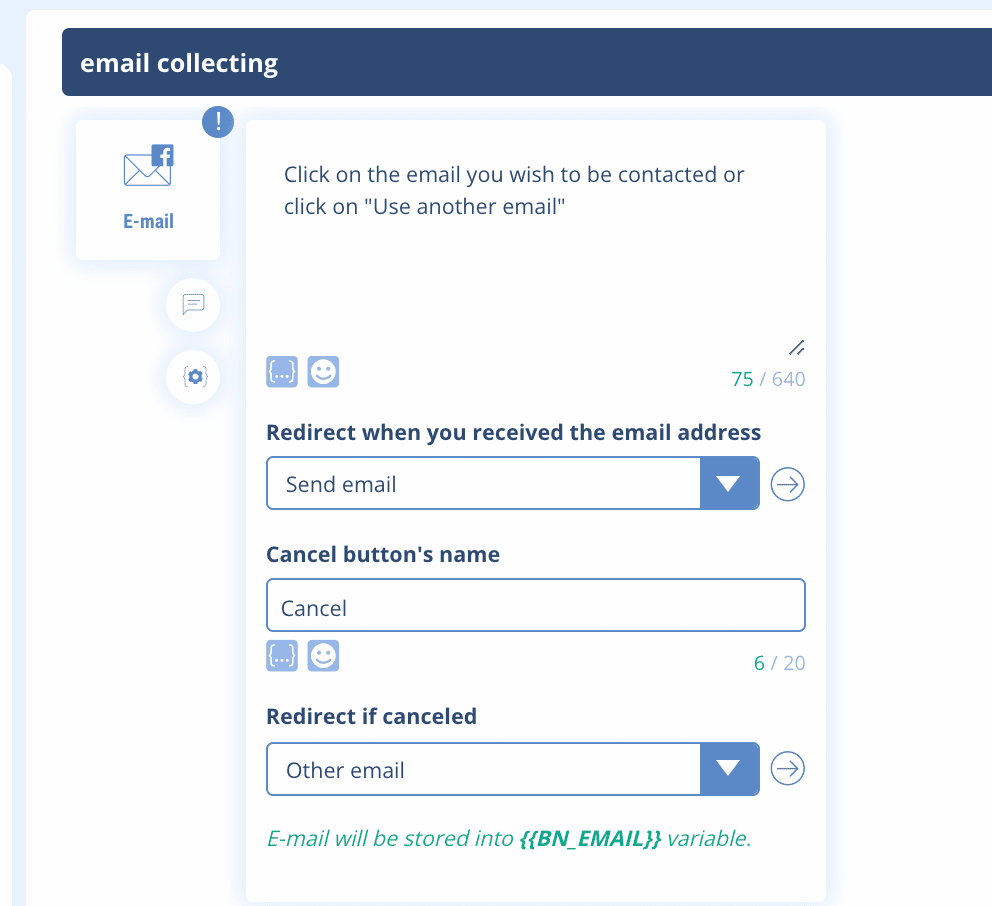
We have modified the cancel button which redirects to a simple user input sequence. In concrete terms, this is what will be offered to your user:

At this point, 2 cases are possible:
1) The user clicks on his email then it will be retained in the variable {{BN_EMAIL}} and the user continues the form
2) The user wishes to enter another email, then it should be sent on the alternative sequence provided for this purpose.
Note: when you register on Facebook, a valid email address is required. If you set up this system, then an email will necessarily appear. It is possible, however, that some Facebook subscribers may not want to share their information with third-party applications.
Let’s go back to case 2). So create the alternative email retrieval sequence and add the “User Entry” module:
Then, ask your user to enter their email. Create the new user variable that will contain this value (in our example it is {{EMAIL}}). You can opt for Email Detection in “Variable Type”. This allows the input to be proposed again if the user does not write a value in the form xxx@xxx.xx. Otherwise, you can let it run free without selecting this option.
This is what the configuration looks like:

NB: we have not done it here but it is possible to add a cancel button so that the user does not have to communicate this data.
On the user side we have this:
Well constructed, this handling will allow you to face a maximum of cases and to mitigate the loss of information by proposing alternatives to your users.