

Comment générer une IA à partir de vo données en quelques clics.

Dans cet article, nous allons vous expliquer les étapes qui vous permettront d’ajouter une IA personnalisée automatiquement à partir de vos données en quelques minutes.
Vous allez voir à quel point c’est simple : il vous suffit d’uploader un simple fichier CSV et Smart AI de Botnation s’occupe de tout. En quelques clics, votre chatbot pourra répondre à vos utilisateurs avec la puissance de la reconnaissance du langage naturel des IA Génératives sur la base unique de vos données.
1. Par où commencer ?
Ouvrez votre chatbot dans l’interface de construction de Botnation et rendez vous dans les Paramètres à l’onglet SMART AI.
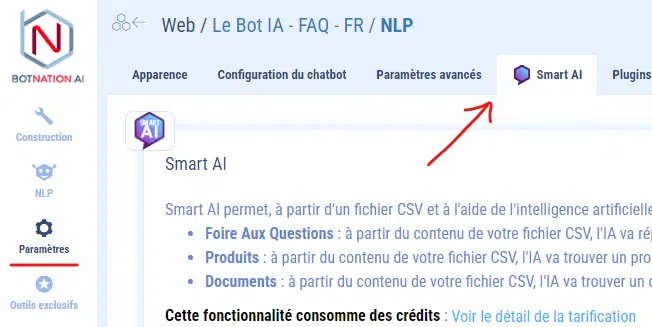
Cliquez sur le bouton « CRÉER UNE IA PERSONNALISÉE« .
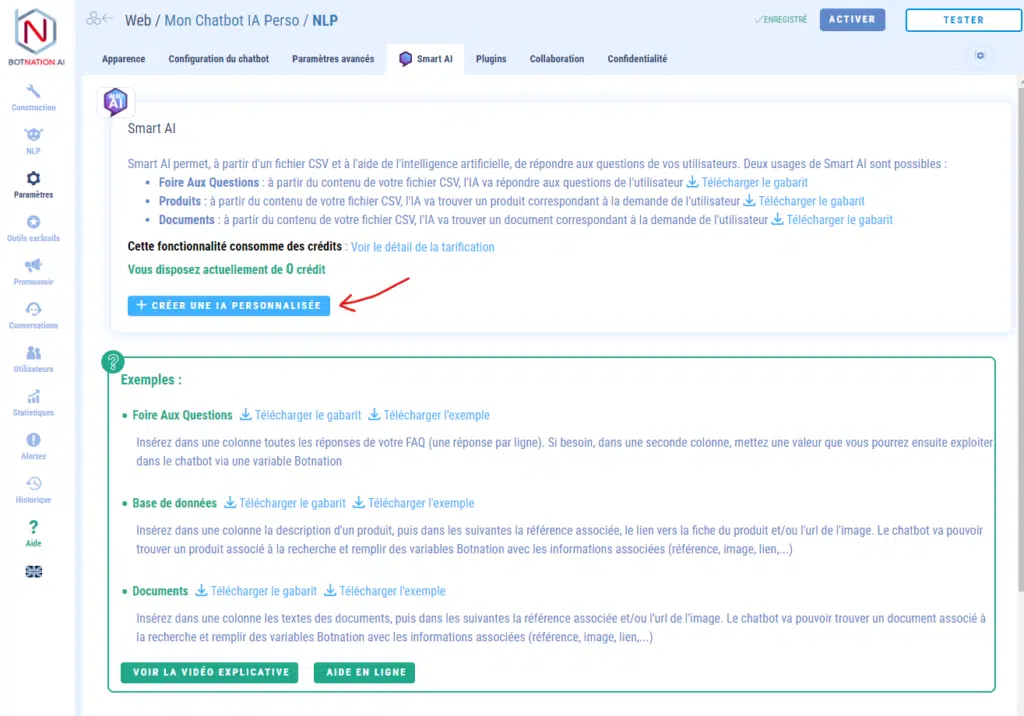
Cela ouvrira l’assistant de création de chatbot SMART AI.
2. L’assistant de création d’IA personnalisée SMART AI
A. Types de chatbot
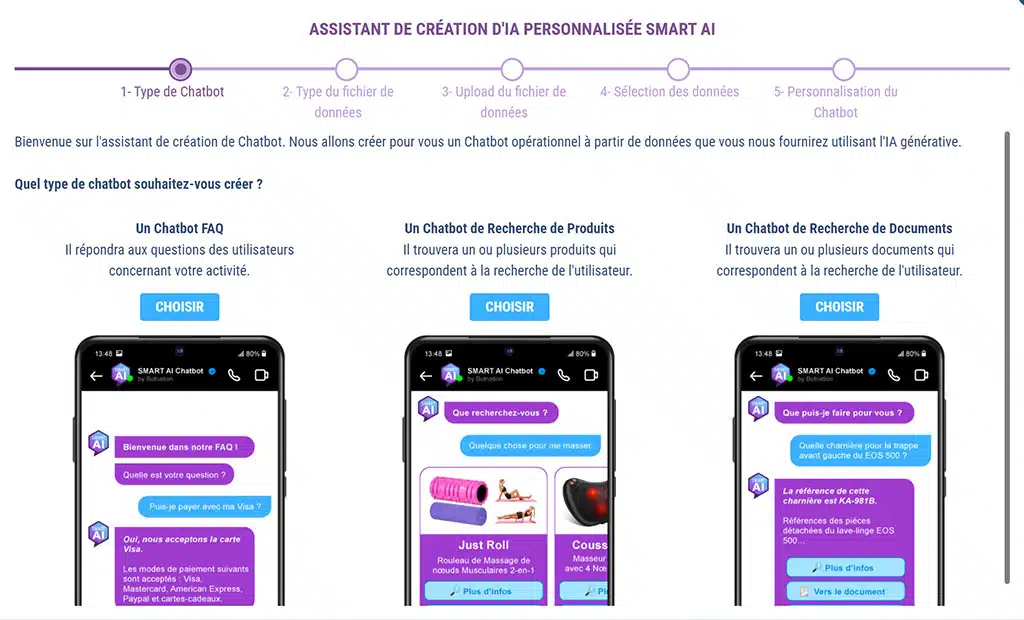
La première étape vous présente ce qu’un chatbot créé par SMART AI peut faire.
Il s’agît ici de choisir ce que le chatbot va faire en fonction de vos données.
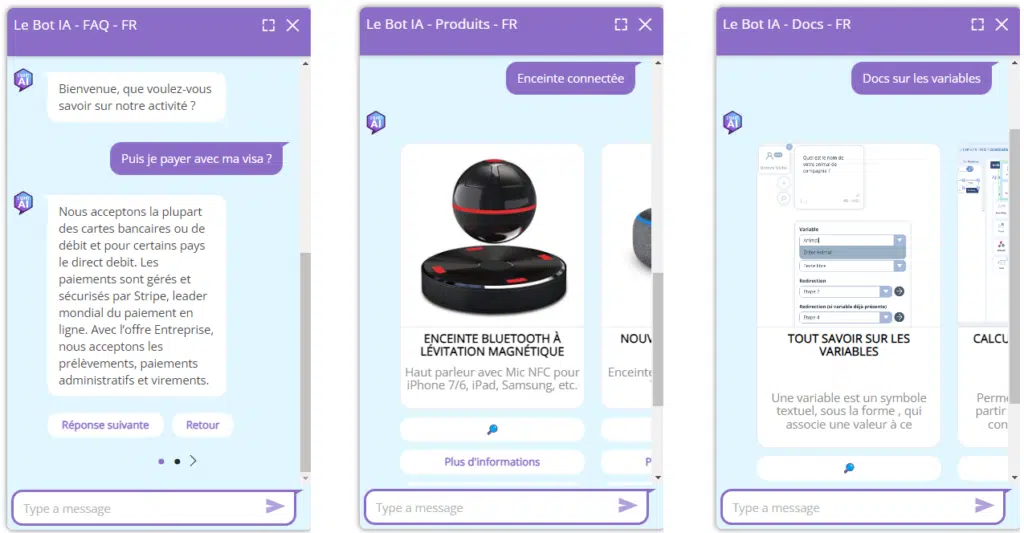
Il y a 3 types de chatbot :
– Chatbot FAQ : Il répond aux questions des utilisateurs concernant votre activité,
– Chatbot de Recherche de Produits : Il trouve un ou plusieurs produits qui correspondent à la recherche de l’utilisateur,
– Chatbot de Recherche de Documents : Il trouve un ou plusieurs documents qui correspondent à la recherche de l’utilisateur.
Faites votre choix, et cliquez sur le bouton « CHOISIR »
B. Upload du fichier de données
a. Chatbot FAQ
Choix du type de fichier
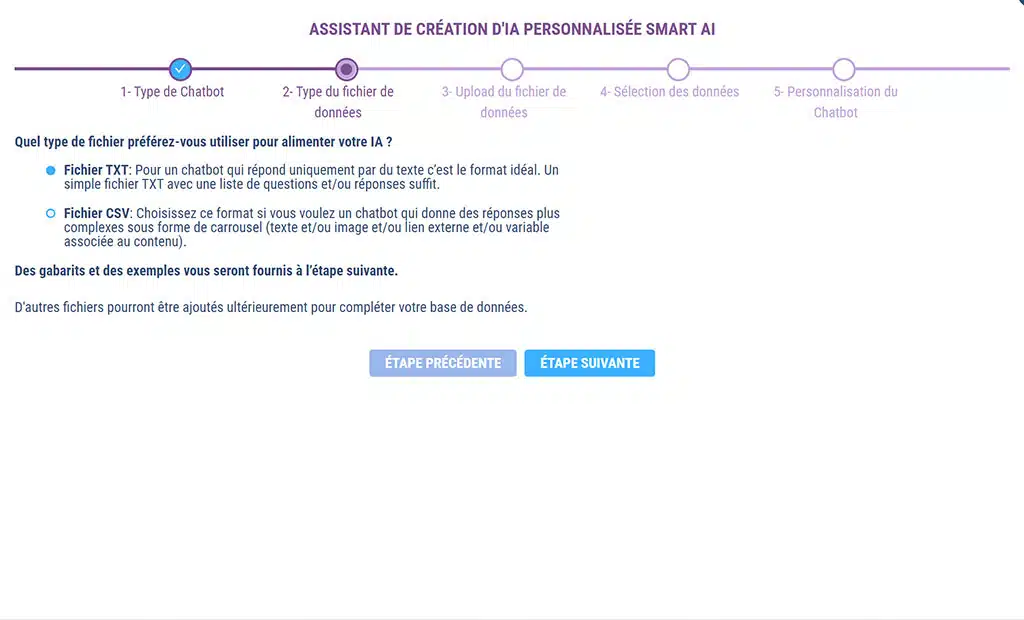
Pour les chatbots FAQ nous proposons 2 types de fichier pour alimenter votre IA personnalisée :
– TXT : le format commun à tous les programmes de traitement de texte,
– CSV : le format commun à tous les tableurs.
Si vous voulez associer une image et/ou un bouton à la réponse du chatbot, choisissez le format CSV.
Faites votre choix, et cliquez sur le bouton « ÉTAPE SUIVANTE »
Fichier TXT
A cette étape vous devez choisir si vous voulez que SMART AI analyse les questions et/ou seulement les réponses.
L’analyse des questions n’est pas nécessaire mais c’est un plus.
Il convient de mettre en forme le fichier TXT pour que SMART AI le comprenne.
Pour une analyse des questions et des réponses : Question / Saut de ligne / Paragraphe de réponse / Saut de ligne X2 / Question suivante / etc.
Pour une analyse des réponses uniquement : Paragraphe de réponse / Saut de ligne X2 / Paragraphe de réponse suivante / Saut de ligne X2 / etc.
N’hésitez pas à télécharger nos exemples de fichier TXT pour vous inspirer.
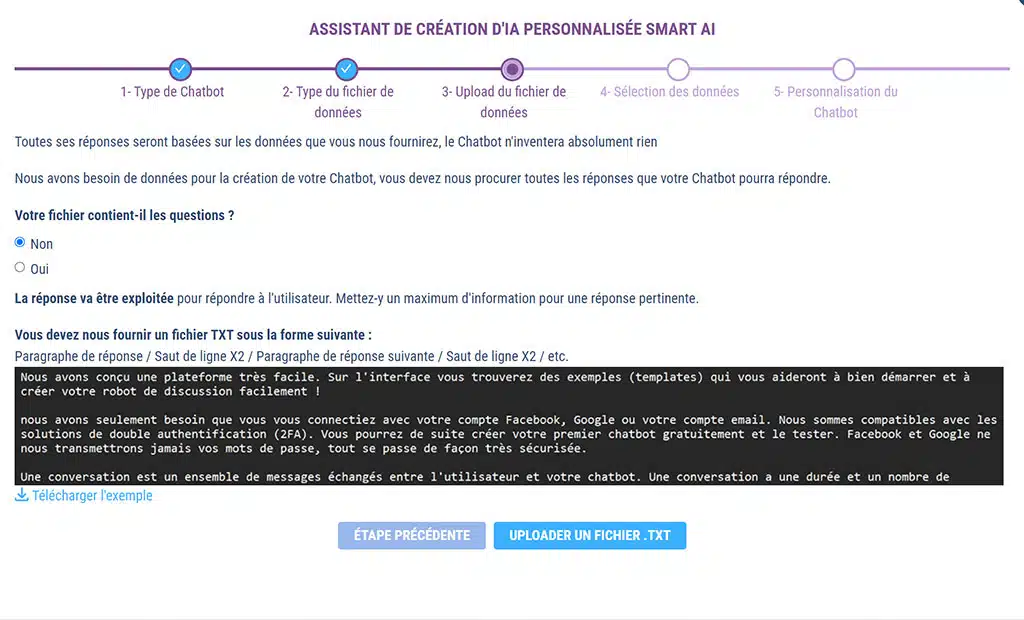
En cliquant sur le bouton « UPLOADER UN FICHIER TXT» vous ouvrirez l’explorateur de fichier de votre ordinateur et vous pourrez y choisir votre fichier.
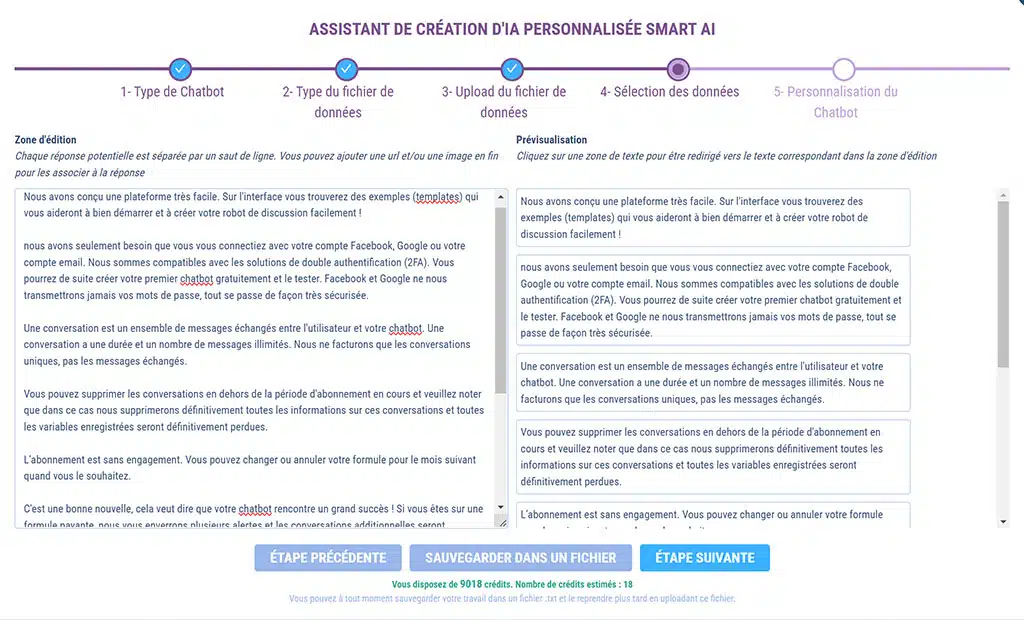
Le fichier s’ouvrira alors dans l’interface de l’étape suivante avec à gauche votre fichier et à droite la segmentation que SMART AI a compris.
Ci dessous l’interface si on a choisi l’option Réponses uniquement.
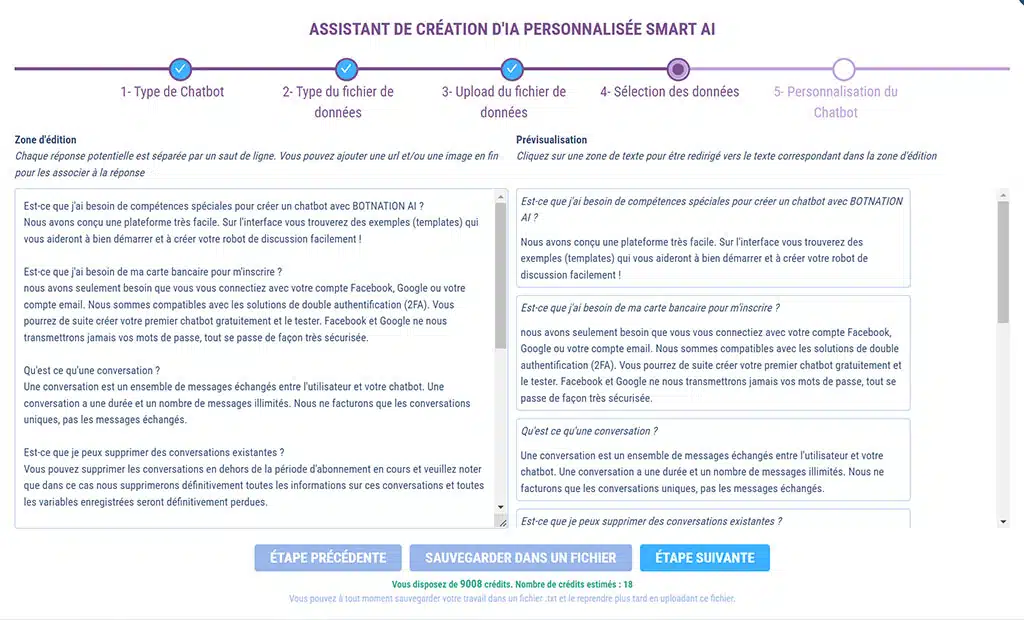
Ci dessous l’interface si on a choisi l’option Questions et Réponses.
Cliquez sur « ÉTAPE SUIVANTE » pour valider votre fichier.
Fichier CSV
Il convient de mettre en forme le fichier CSV pour que SMART AI le comprenne.
Nous vous conseillons donc de télécharger notre exemple de fichier CSV et notre gabarit pour vous aider.
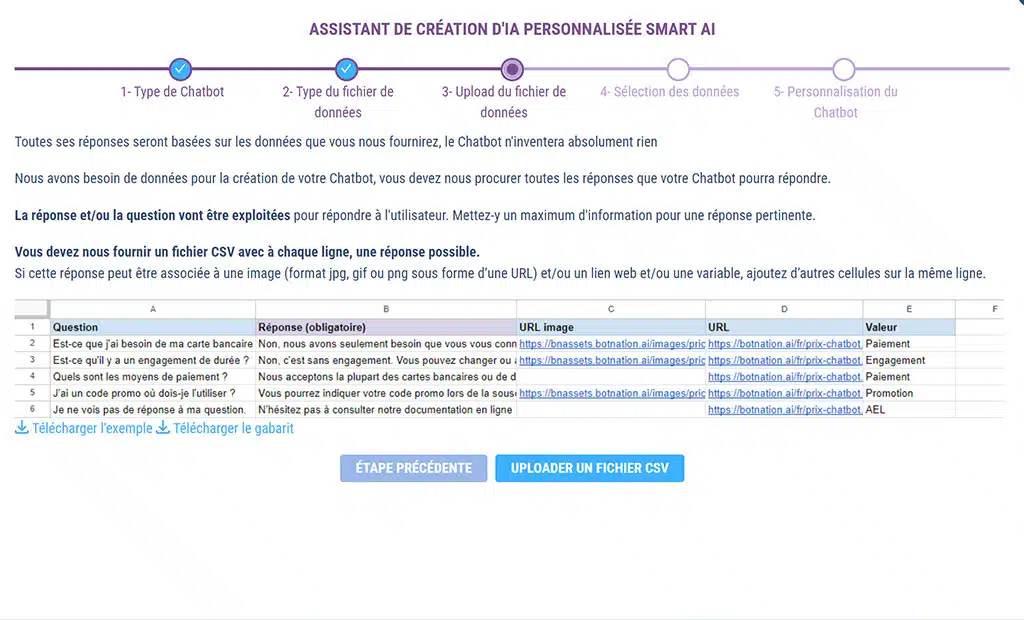
En cliquant sur le bouton « UPLOADER UN FICHIER CSV» vous ouvrirez l’explorateur de fichier de votre ordinateur et vous pourrez y choisir votre fichier.
Le fichier s’ouvrira alors dans l’interface de l’étape suivante.
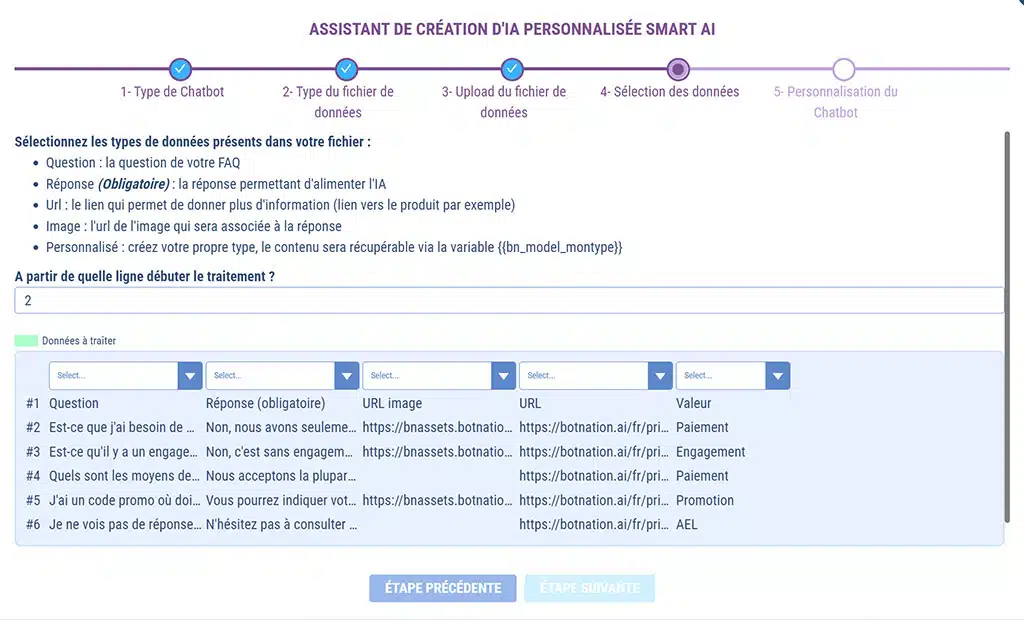
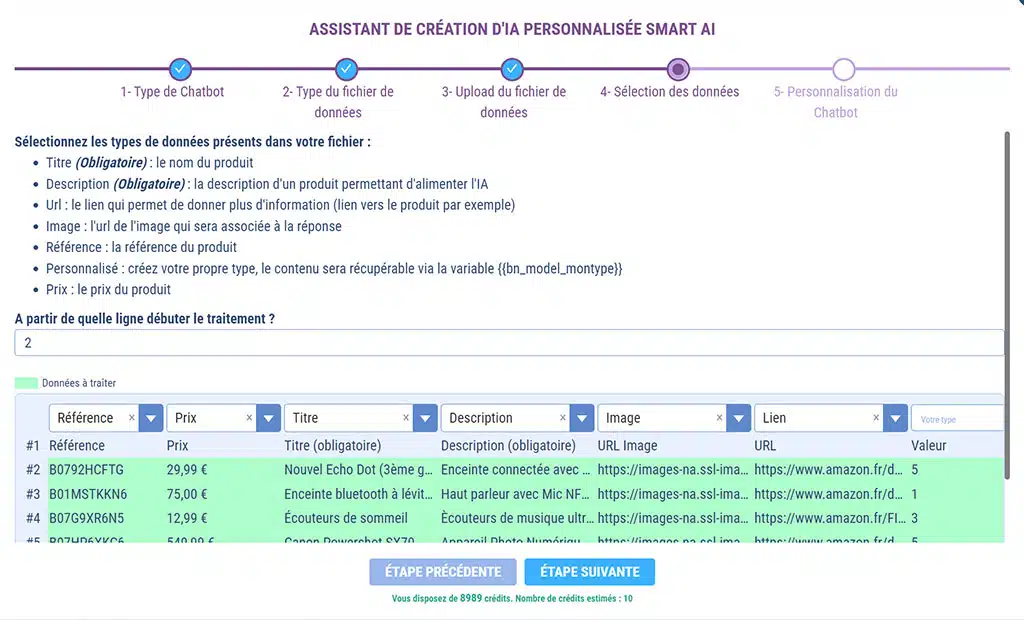
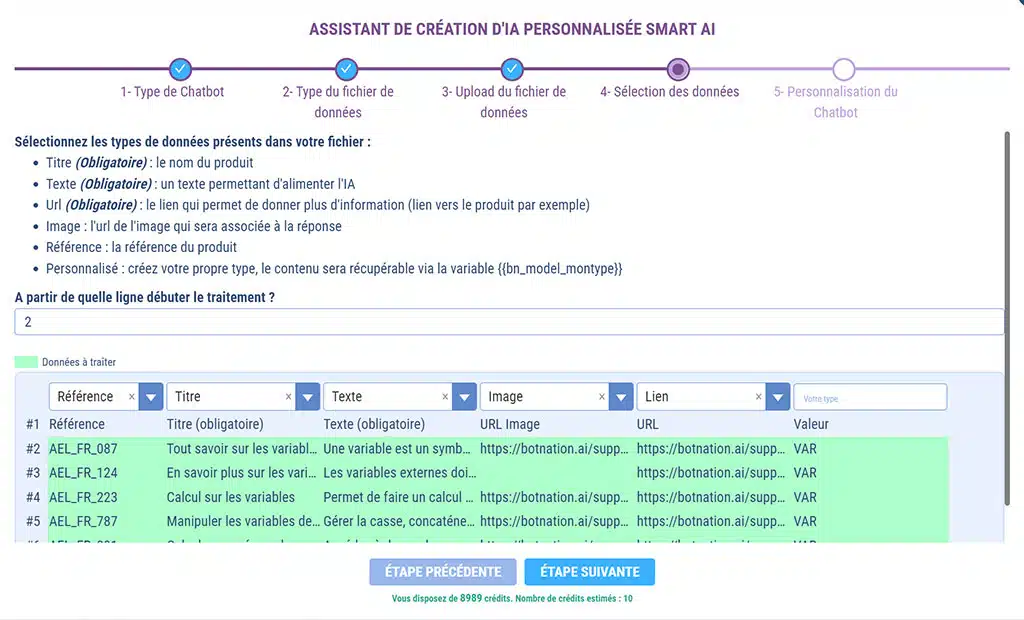
C’est à cette étape que vous allez faire correspondre les colonnes de votre fichier CSV au type de données que doit traiter SMART AI.
Pour ce faire vous faite votre choix dans le menu déroulant au dessus de chaque colonne.
ATTENTION
N’oubliez pas de vérifier d’indiquer à partir de quelle ligne le traitement doit débuter.
L’assistant vous indiquera automatiquement le nombre de crédits nécessaires au traitement des données.
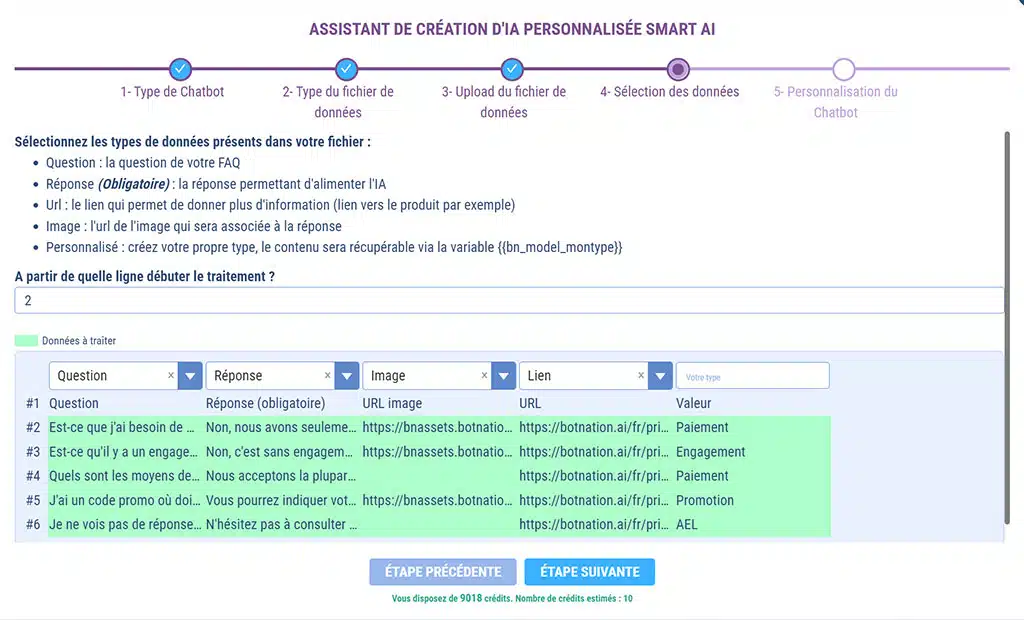
Cliquez sur « ÉTAPE SUIVANTE » pour valider votre fichier.
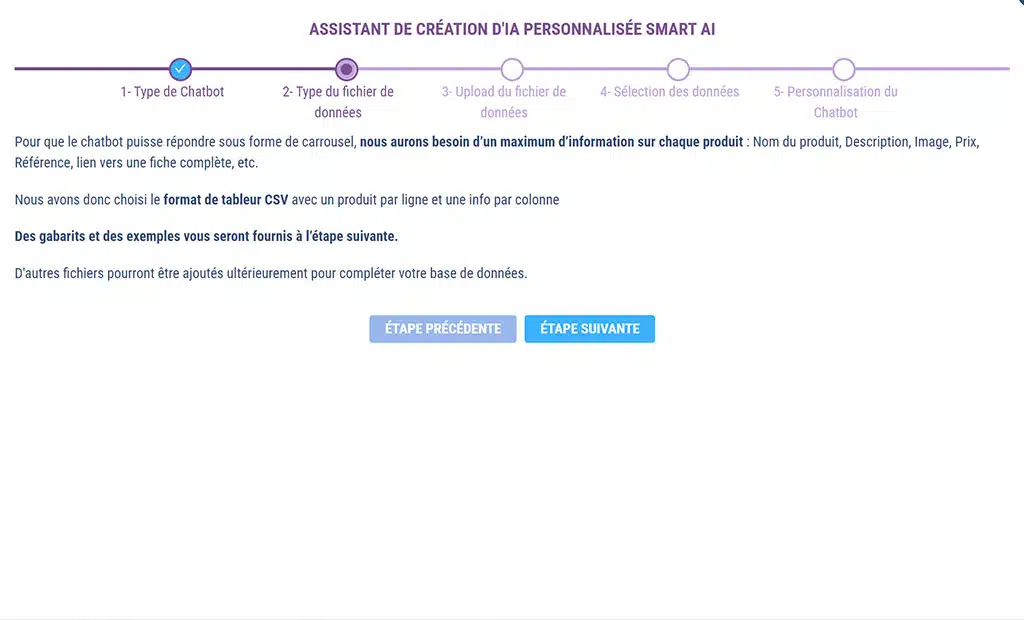
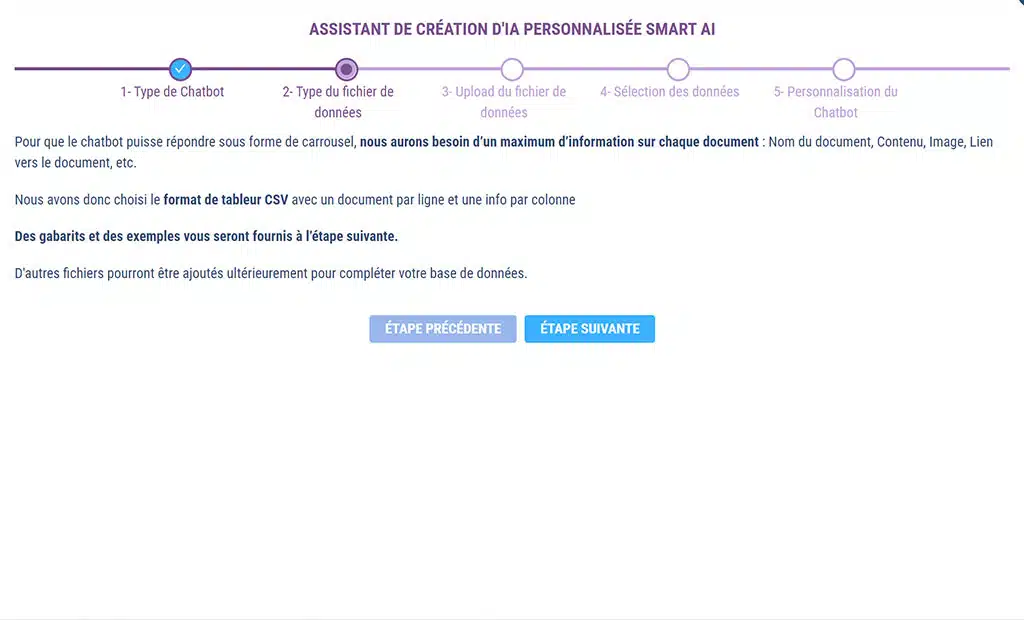
b. Chatbot de recherche de produits
Pour les chatbots Recherche de Produits, nous proposons uniquement le format CSV (format standard des tableurs) pour l’upload des données.
Cliquez sur le bouton « ÉTAPE SUIVANTE »
Il convient de mettre en forme le fichier CSV pour que SMART AI le comprenne.
Nous vous conseillons donc de télécharger notre exemple de fichier CSV et notre gabarit pour vous aider.
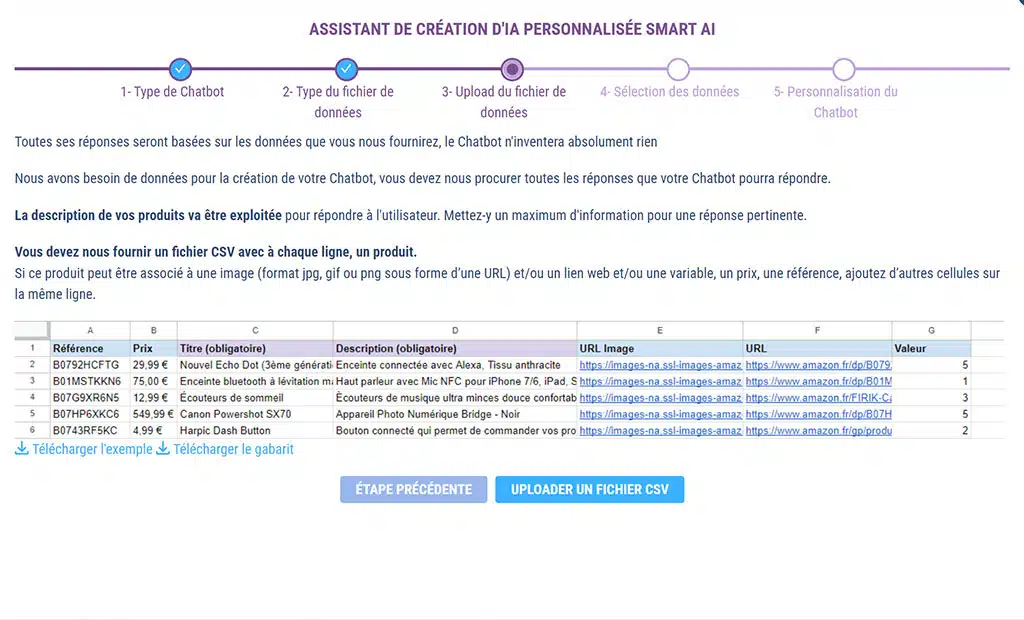
En cliquant sur le bouton « UPLOADER UN FICHIER CSV» vous ouvrirez l’explorateur de fichier de votre ordinateur et vous pourrez y choisir votre fichier.
Le fichier s’ouvrira alors dans l’interface de l’étape suivante.

C’est à cette étape que vous allez faire correspondre les colonnes de votre fichier CSV au type de données que doit traiter SMART AI.
Pour ce faire vous faite votre choix dans le menu déroulant au dessus de chaque colonne.
ATTENTION
N’oubliez pas de vérifier d’indiquer à partir de quelle ligne le traitement doit débuter.
L’assistant vous indiquera automatiquement le nombre de crédits nécessaires au traitement des données.
Cliquez sur « ÉTAPE SUIVANTE » pour valider votre fichier.
c. Chatbot de recherche de documents
Pour les chatbots Recherche de Documents, nous proposons uniquement le format CSV (format standard des tableurs) pour l’upload des données.
Cliquez sur le bouton « ÉTAPE SUIVANTE »
Il convient de mettre en forme le fichier CSV pour que SMART AI le comprenne.
Nous vous conseillons donc de télécharger notre exemple de fichier CSV et notre gabarit pour vous aider.
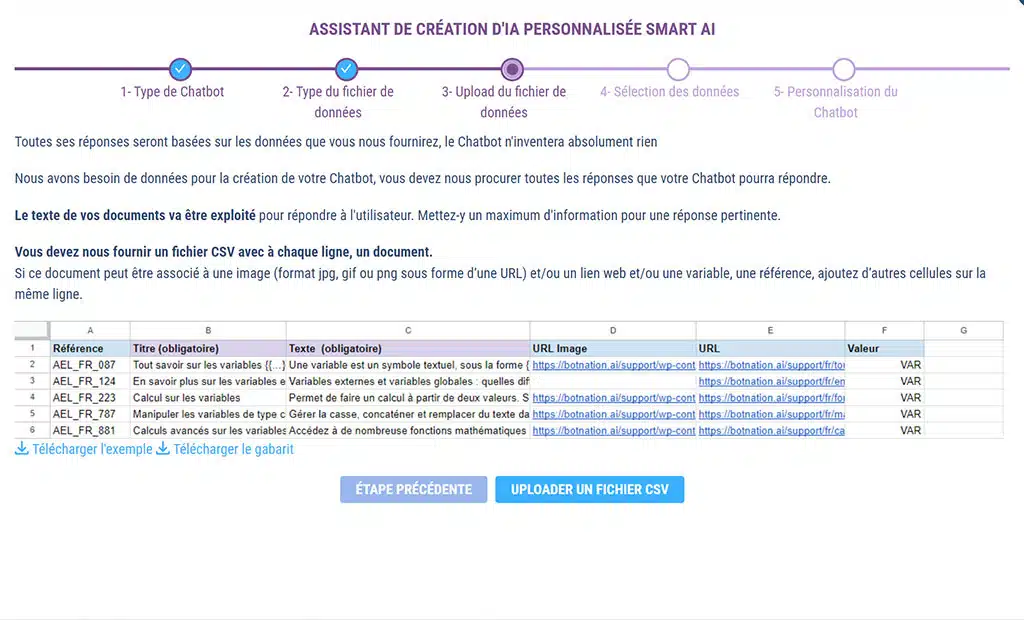
En cliquant sur le bouton « UPLOADER UN FICHIER CSV» vous ouvrirez l’explorateur de fichier de votre ordinateur et vous pourrez y choisir votre fichier.
Le fichier s’ouvrira alors dans l’interface de l’étape suivante.
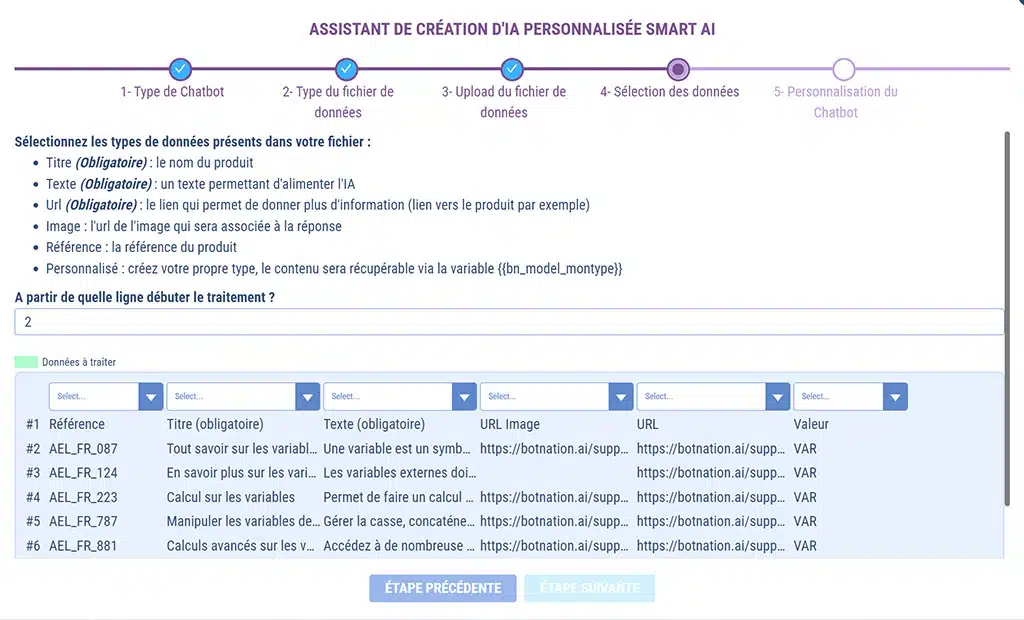
C’est à cette étape que vous allez faire correspondre les colonnes de votre fichier CSV au type de données que doit traiter SMART AI.
Pour ce faire vous faite votre choix dans le menu déroulant au dessus de chaque colonne.
ATTENTION
N’oubliez pas de vérifier d’indiquer à partir de quelle ligne le traitement doit débuter.
L’assistant vous indiquera automatiquement le nombre de crédits nécessaires au traitement des données.
Cliquez sur « ÉTAPE SUIVANTE » pour valider votre fichier.
d. Achat de crédits
Si vous n’avez pas ou pas assez de crédits, l’assistant vous proposera d’en acheter.
Cliquez alors sur le bouton « ACHETER DES CRÉDITS« .
Cela ouvrira une fenêtre en surcouche avec nos offres d’achat de crédits.
Les crédits sont nécessaire pour la création du chatbot avec SMART AI, mais aussi pour chaque ajout à la base de donnée ainsi qu’à chaque requête faites par les utilisateurs.
Il convient donc de toujours en avoir une réserve sinon vos utilisateur ne pourront plus faire de recherche grâce à votre chatbot. Mais ne vous inquiétez pas, votre chatbot ne s’arrêtera pas d’un coup, vous serez toujours prévenu par email lorsque votre nombre de crédits sera critique.
e. Personnalisation de l’IA personnalisée
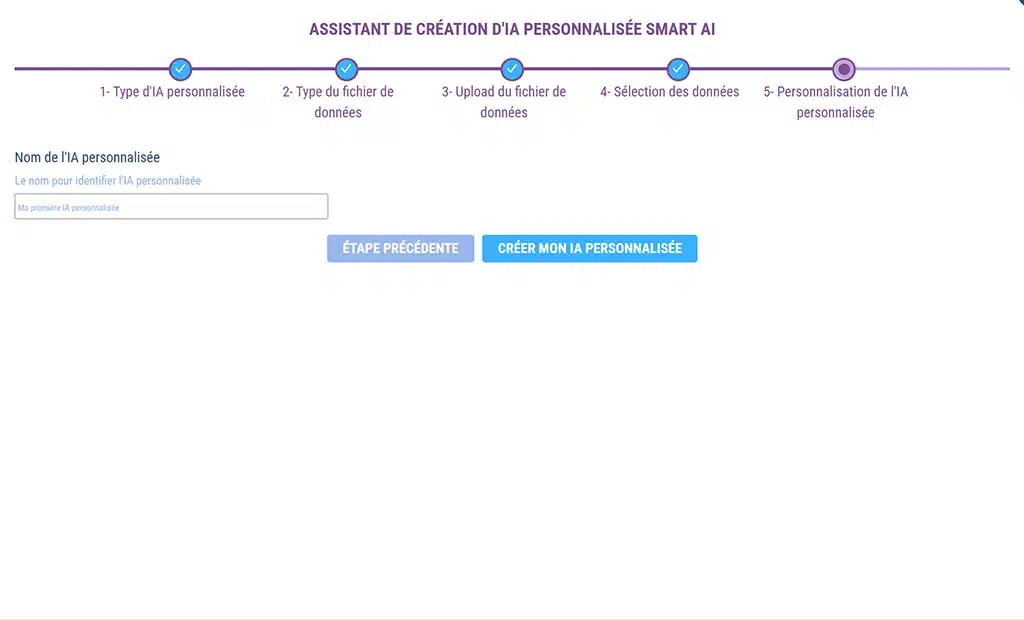
C’est à cette étape que vous allez pouvoir donner un nom à votre IA personnalisée.
Cliquez enfin sur le bouton « CRÉER MON IA PERSONNALISÉE » pour que la magie de SMART AI opère.
3. Ajouter votre IA personnalisée à votre chatbot
Choisissez une séquence et parmi les fonctionnalités, choisissez SMART AI.
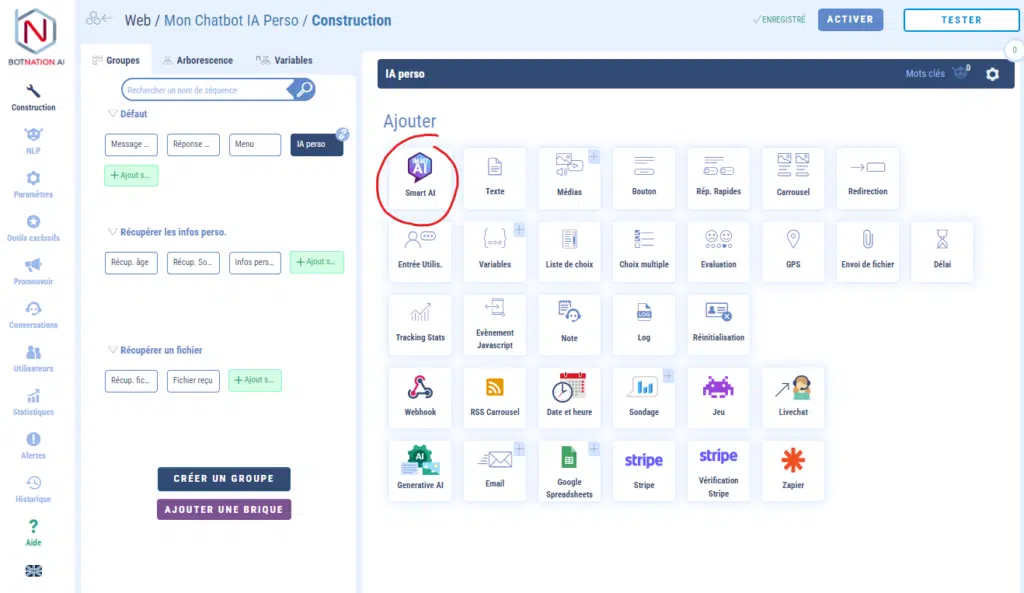
Cela ajoutera l’élément suivant :
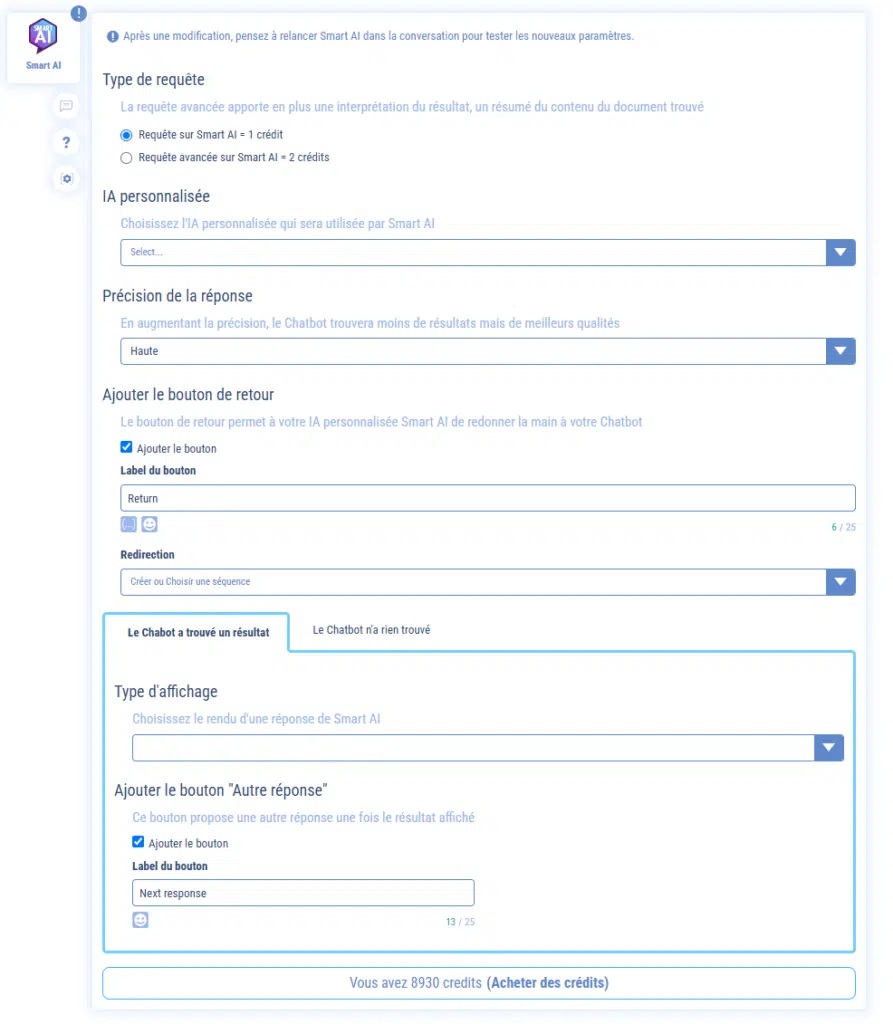
A. Paramètres de base
Type de requête
Vous avez le choix entre deux options de traitement de la réponse :
- Requête sur Smart AI = 1 crédit , le bot affichera le contenu correspondant à la demande qui contient la réponse,
- Requête avancée sur Smart AI = 2 crédits, le bot répondra spécifiquement à la question puis affichera le contenu correspondant.
IA personnalisée
Sélectionnez votre IA personnalisée dans le menu déroulant.
Précision de la réponse
Vous avez le choix entre 3 options :
- Moyenne
- Haute
- Stricte
La précision « Moyenne » donne généralement les résultats escomptés. Mais, en fonction des contenus, ces options peuvent avoir des effets différents. Nous vous conseillons donc de faire des tests.
Afficher le bouton de retour
En cochant cette option, vous proposez aux utilisateurs de pouvoir quitter l’IA personnalisée à l’aide d’un bouton. Vous pouvez aussi en choisir le libellé.
B. Onglet « Le chatbot a trouvé un résultat »
Type d’affichage
Selon le type d’IA nous vous proposons différentes manières d’afficher les résultats :
- Texte
- Texte + Image
- Carrousel
Afficher le bouton qui propose une autre réponse
En cochant cette option, vous proposez aux utilisateurs du bot un bouton qui renvoie vers la réponse suivante la plus proche trouvée par l’IA. Vous pouvez aussi en choisir le libellé.
Afficher le bouton qui propose les détails (carrousels)
Si vous avez choisi le type d’affichage carrousel, vous aurez cette option en plus. Cela vous permet de proposer un bouton qui donne le détail de la réponse. C’est particulièrement pratique pour avoir plus d’info sur un produit sans quitter le chatbot.
Afficher le bouton « En savoir plus »
Si vous avez attribuez une colonne de votre CSV au type de contenu « Lien », vous pourrez ici choisir d’afficher un bouton et d’en choisir le libellé.
C. Onglet « Le chatbot n’a rien trouvé »
Ici on a le choix entre plusieurs comportements du chatbot dans le cas ou aucune réponse satisfaisante n’a été trouvée.
La première option est vous donne le choix entre :
- Afficher un message (avec ou sans l’option bouton « Livechat »)
- Rediriger vers une séquence
a. Afficher un message
Cette option affiche seulement un texte.
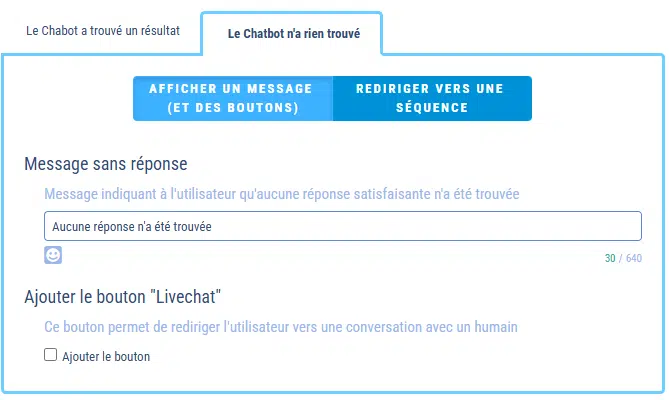
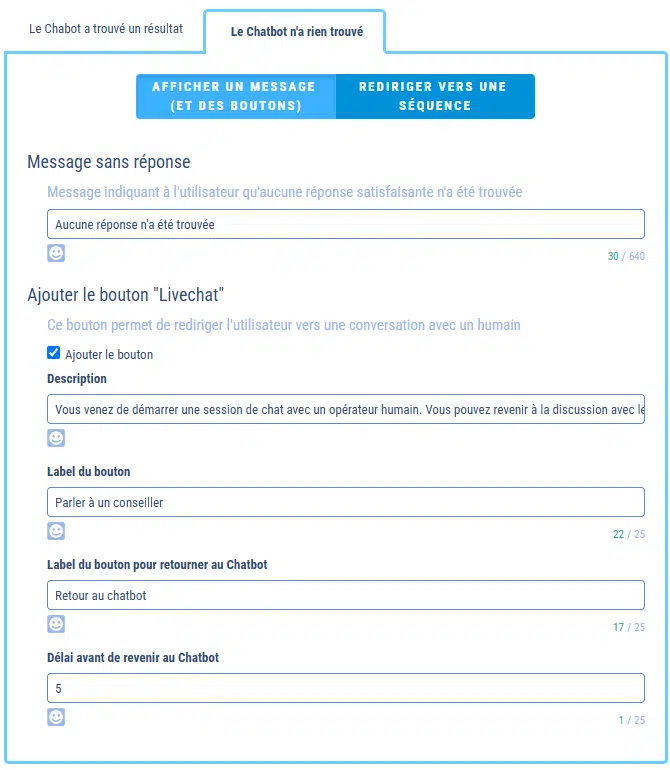
b. Afficher un message et un bouton « Livechat »
Cette option propose à l’utilisateur de parler avec un conseiller humain dans le cas ou l’IA Personnalisée n’a pas de réponse.
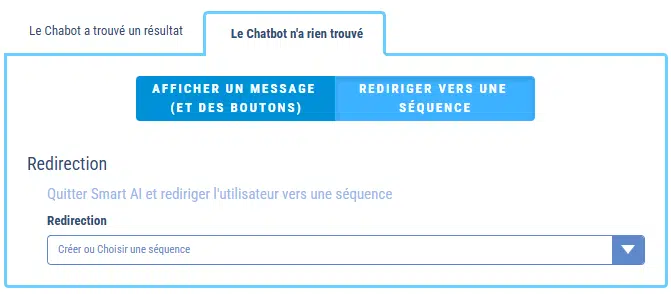
c. Rediriger vers une séquence
En ce cas, le chatbot lance une séquence lorsqu’il n’a pas trouvé de réponse. Sur cette séquence vous êtes libre de choisir différents comportements.
Par exemple : proposer à vos utilisateurs de reformuler leur question, leur proposer de laisser un message et/ou de joindre un conseiller selon leur disponibilité.
D. Vos crédits
Le dernier élément affiche vos crédits actuels. En cliquant dessus, une fenêtre superposée s’ouvre vous permettant d’acheter des crédits.

4. Conclusion
Voilà, vous n’avez plus qu’à tester votre chatbot et à le publier pour proposer à vos utilisateurs une expérience conversationnelle sans pareil.
Comme promis, en quelques minutes, vous avez une IA personnalisée à partir de vos données grâce à SMART AI de Botnation.
En plus :
– Modifiez votre IA personnalisée avec SMART AI de Botnation