Add action buttons to your Messenger chatbot
1. Use
There are two different ways to create a button.
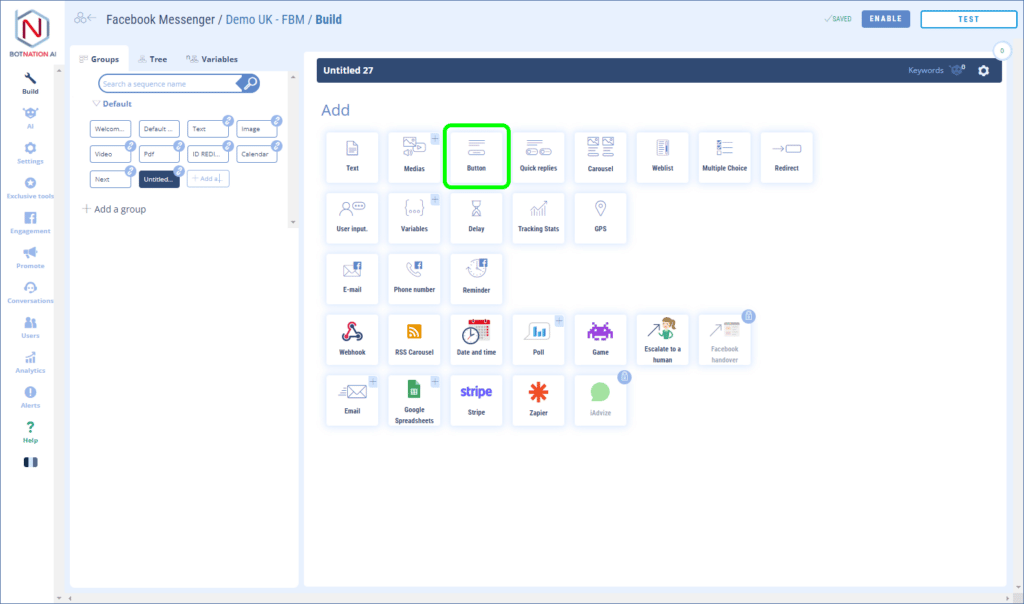
The first is to add this feature directly by clicking on the “button” icon found among the other features. (See below).
The second way is to create a text and then transform this text into a button.
In the end you will have the same result:
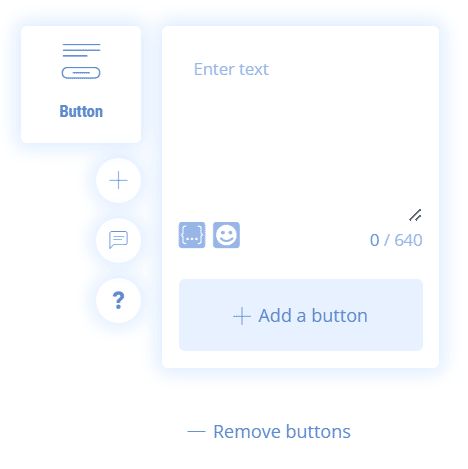
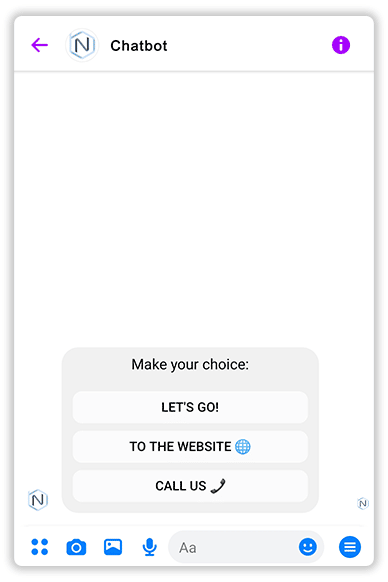
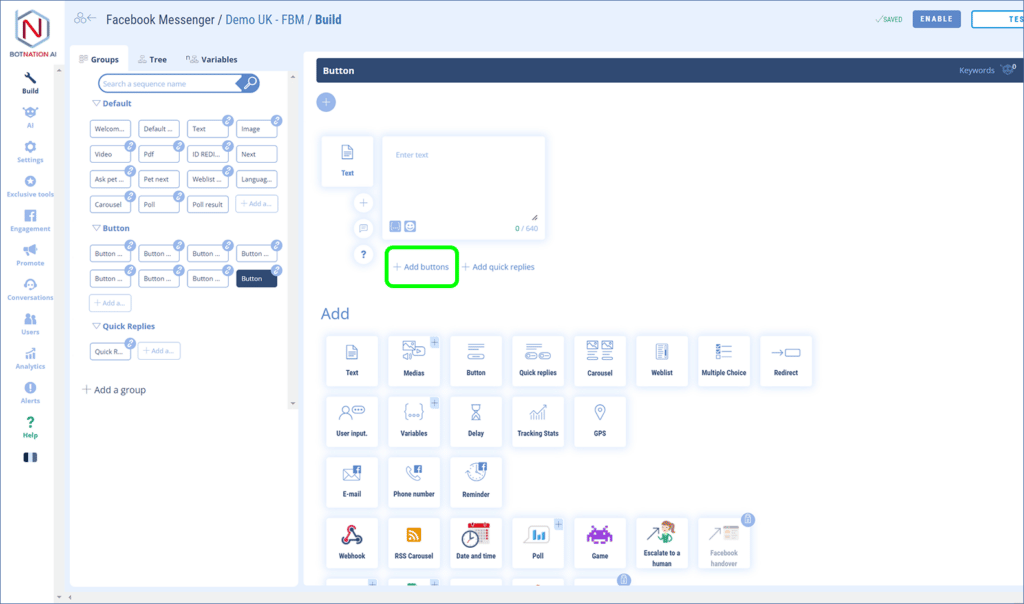
The Button feature always consists of a text (limited to 640 characters) and a maximum of three buttons.
To set up a button, click on ” + Add a button“.
You can then name the button (20 characters max).
Then, you will have the possibility to choose the type of action that the chatbot will perform when the user clicks the button.
A. Redirection
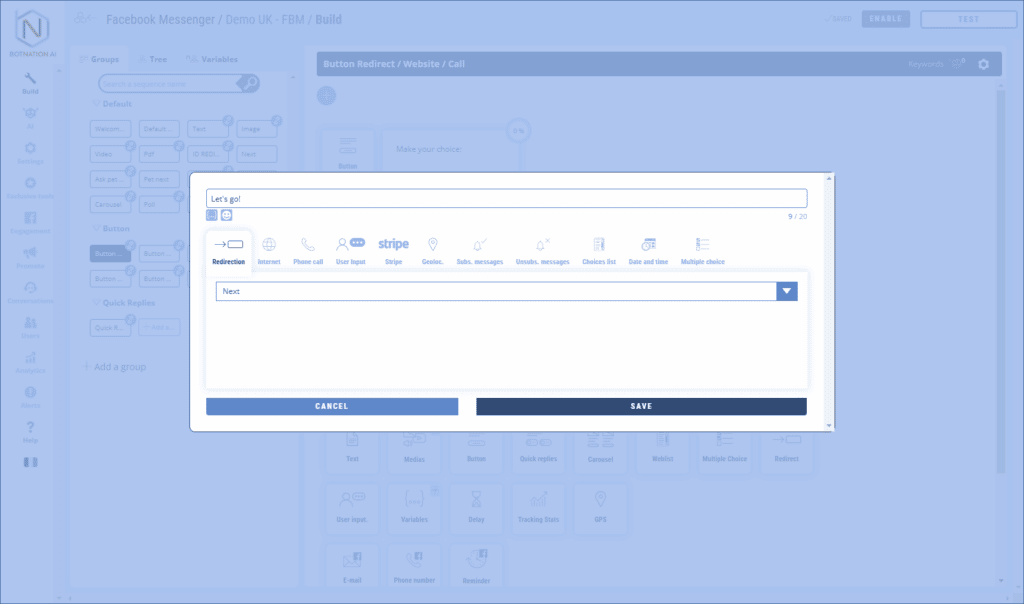
This will redirect your users to another sequence.
See the article : Add a redirection
B. Internet
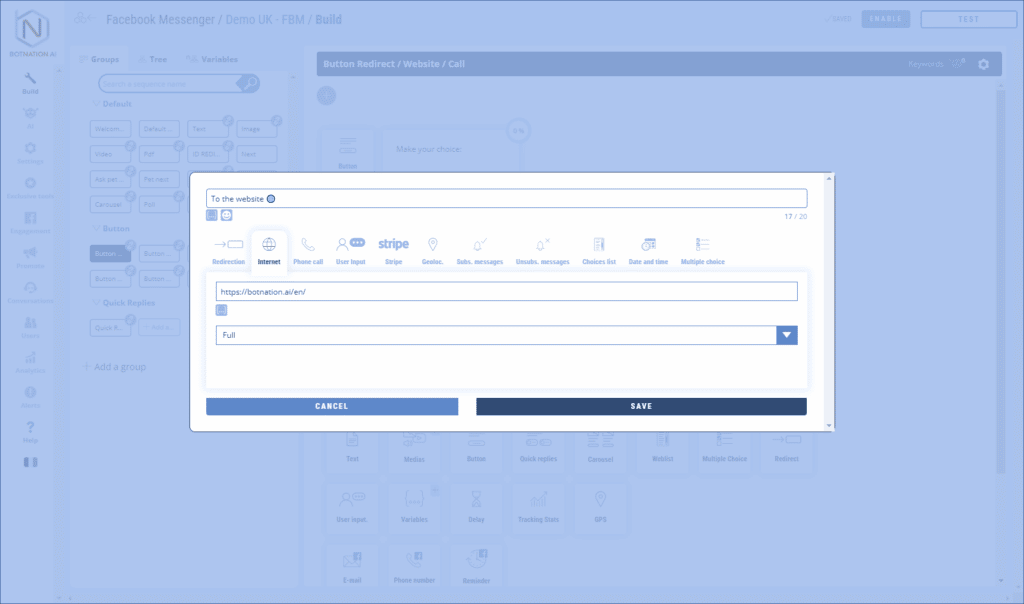
Your chatbot bot will redirect your users to a website.
You have several options for opening the site:
- New tab
- Current tab
- Small popup
- Big popup
TIP
Remember to put the http:// or https:// in front of the address otherwise it will not work.
C. Phone call
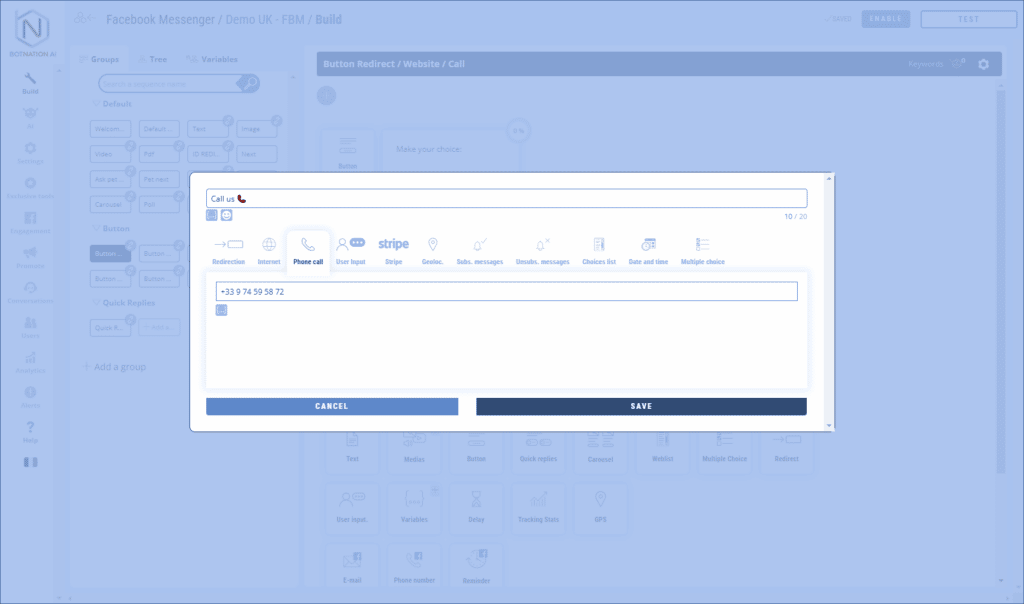
Your users will be able to call directly by clicking the button. This means that if a phone call application is available, it will automatically initiate the call.
TIP
Remember to put the country code before the number. Example for France +33 so the number will be +33162635447 and not 0162635447.
D. User input
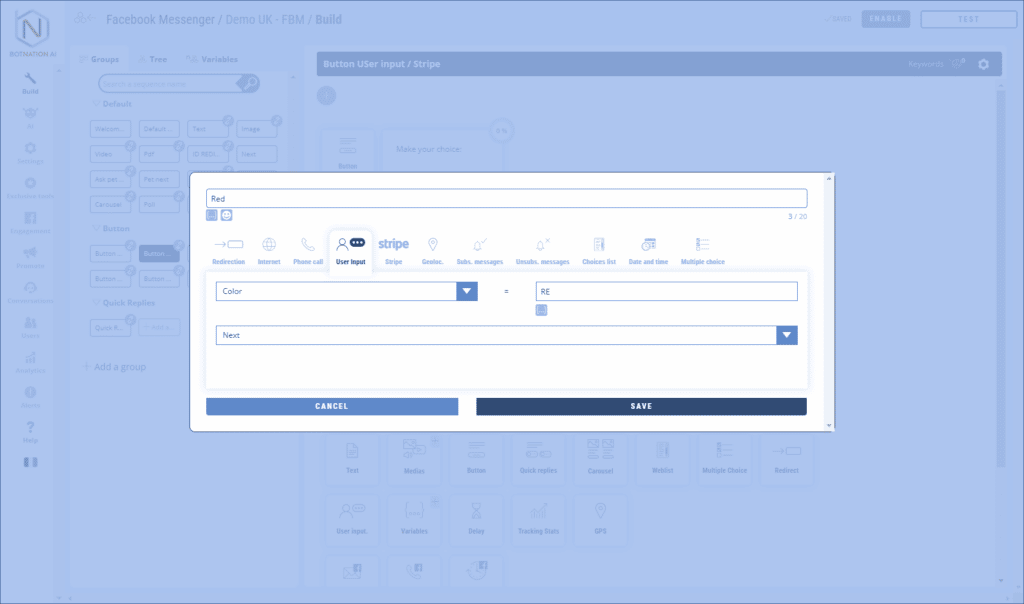
This action allows the chatbot to save a value for a given variable when the user clicks the button.
This is very useful to keep track of your users’ choices.
See the following article: All about {{…}} variables
The parameters of this action are :
- Name of the variable
- Value of the variable
- Redirection sequence
See the article : User input
E. Stripe
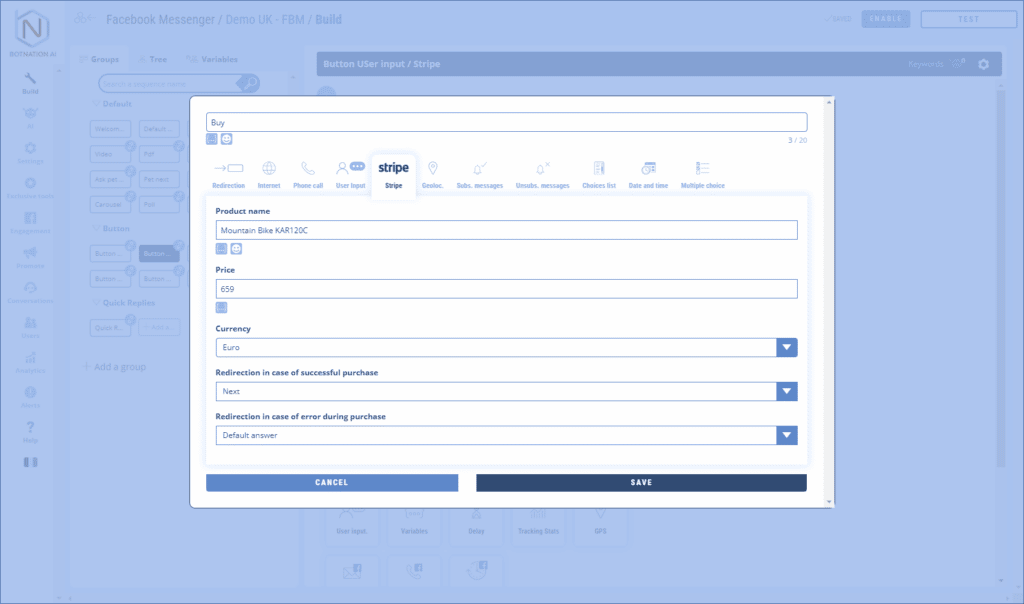
You can bill for digital goods (content, online training, ticketing, etc..) or physical goods using your Stripe account natively linked to your Botnation chatbot.
Once you have configured the Stripe plugin in the chatbot settings you will have the option to set up a Stripe buy button.
To set it up, there are several fields to fill in:
- The name of the product to be sold
- The price of the product
- Product currency
- The redirection sequence in case of a successful purchase
- The redirection sequence in case of purchase failure
F. GPS
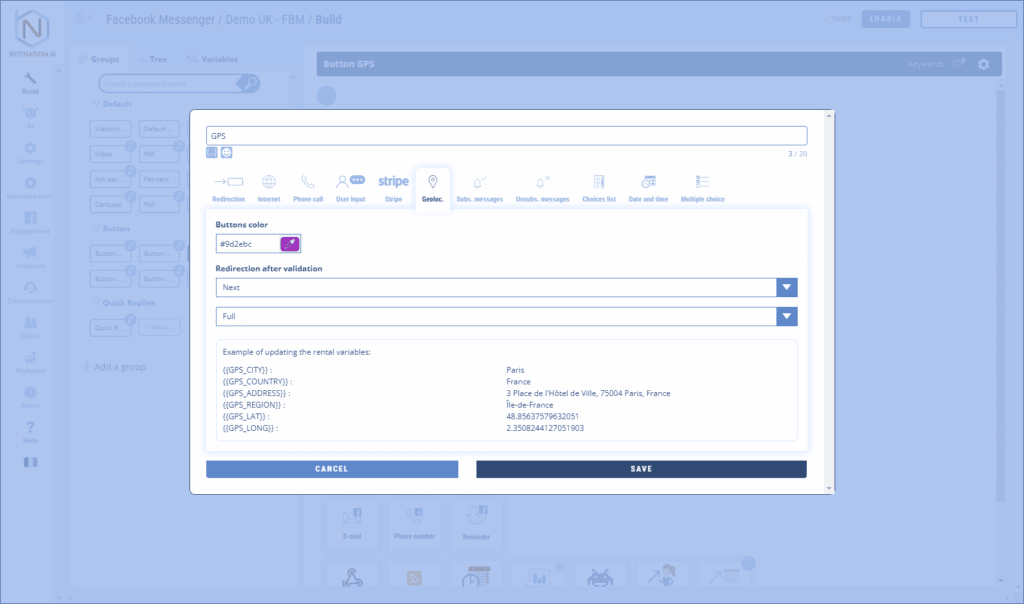
When the button is clicked, a popup window will open with a map and the user will be able to choose his location and validate it.
The parameters of this action are :
- Button color
- Redirection sequence after validation
- Popup type: small, large or full screen
The following variables will be updated with the user’s details:
- {{GPS_CITY}} : the city
- {{GPS_COUNTRY}} : the country
- {{GPS_ADDRESS}} : the address
- {{GPS_REGION}} : the region
- {{GPS_LAT}} : the latitude
- {{GPS_LONG}} : the longitude
See the article: GPS functionality (Messenger)
G. Subscrbe to notifications
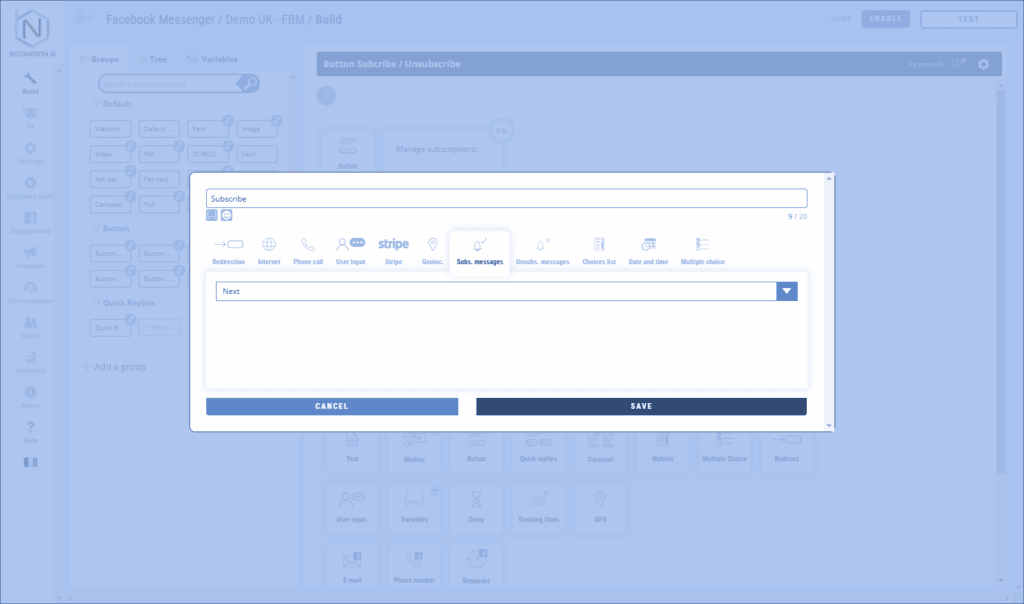
By clicking on this button, the user subscribes and therefore authorizes the chatbot to send notifications.
See the article: Subscribe to Messenger’s Push Notifications
H. Unsubscribe from notifications
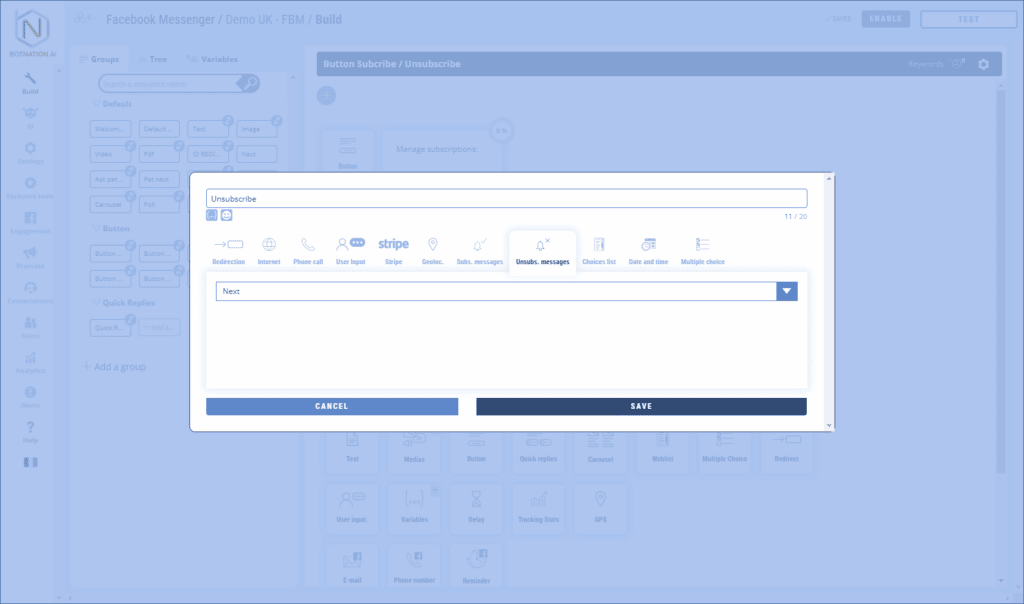
By clicking on this button, the user unsubscribes from chatbot notifications.
See the article: Opt out of Push Notifications
I. Choices list
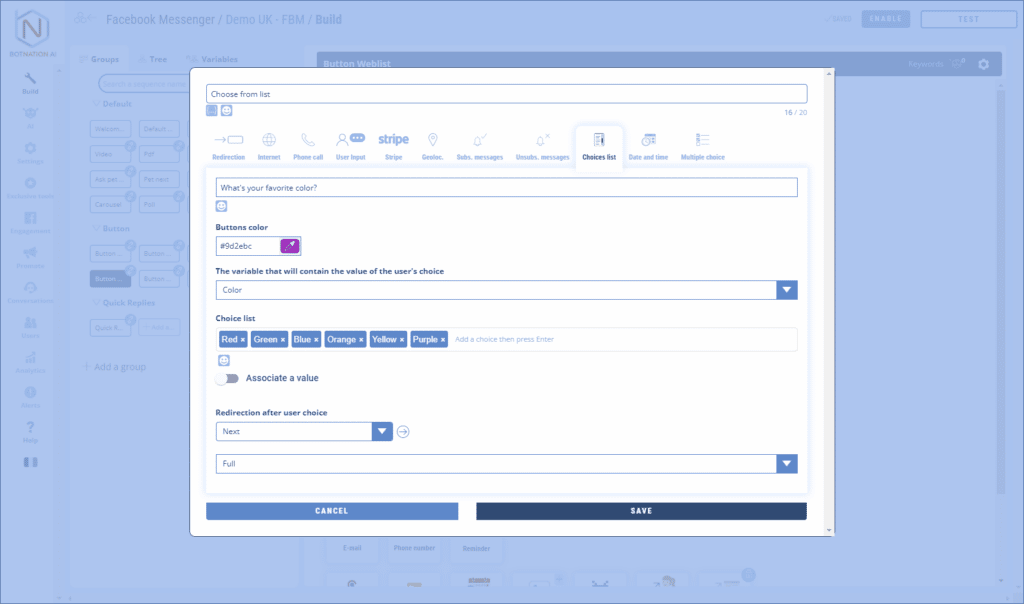
When the button is clicked, a popup window will open and display the different choices in the form of buttons.
There is no limit to the number of choices or to the number of characters of the choices.
This can be useful to display a large list of countries or a list of questions for an FAQ.
The choices are displayed one below the other.
The parameters of this action are :
- Text displayed above the list
- Button color
- Name of the variables
- List of choices (by default the variable will take the name of the choice as value)
- Possibility to enter values different from the name of the choice
- Redirection sequence
- Popup type: small, large or full screen
See the article: The choice list (Messenger)
J. Date and Time
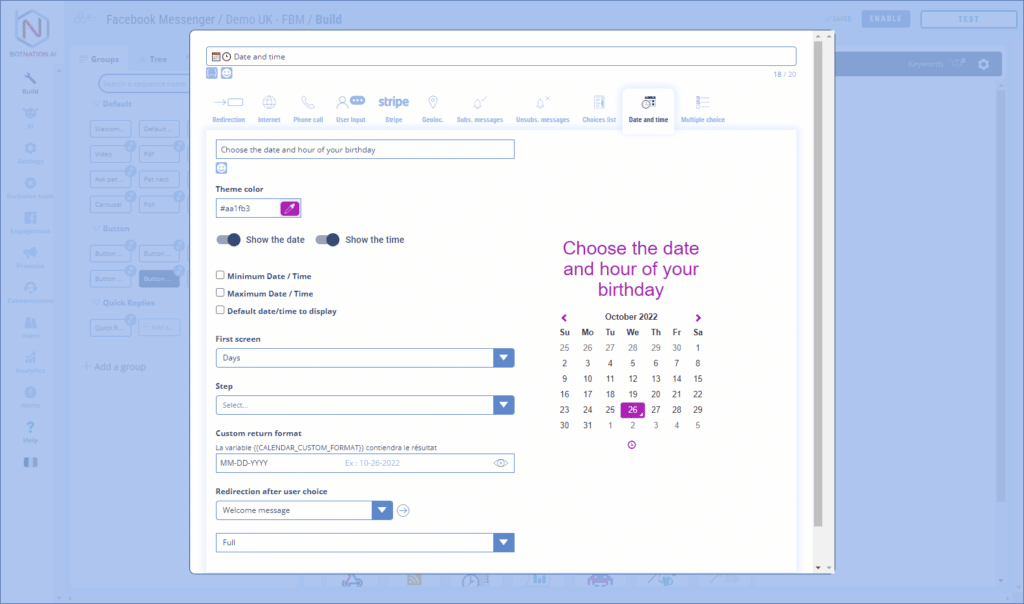
When the button is clicked, a popup window will open and display a calendar and/or a clock that will allow the user to choose a date and/or a time.
The data will be saved in the format chosen in the variable {{CALENDAR_CUSTOM_FORMAT}}
The parameters of this action are :
- Text displayed in the title of the popup
- Button color
- Possibility to request the date and/or time
- Possibility to determine a minimum date/time
- Possibility to determine a maximum date/time
- Possibility to choose a default Date/Time
- Choice of the hour increments: free, 5, 15 or 30 minutes
- Customization of the date/time format
- Redirection sequence
- Popup type: small, large or full screen
See the article: Capture a date
K. Multiple choice
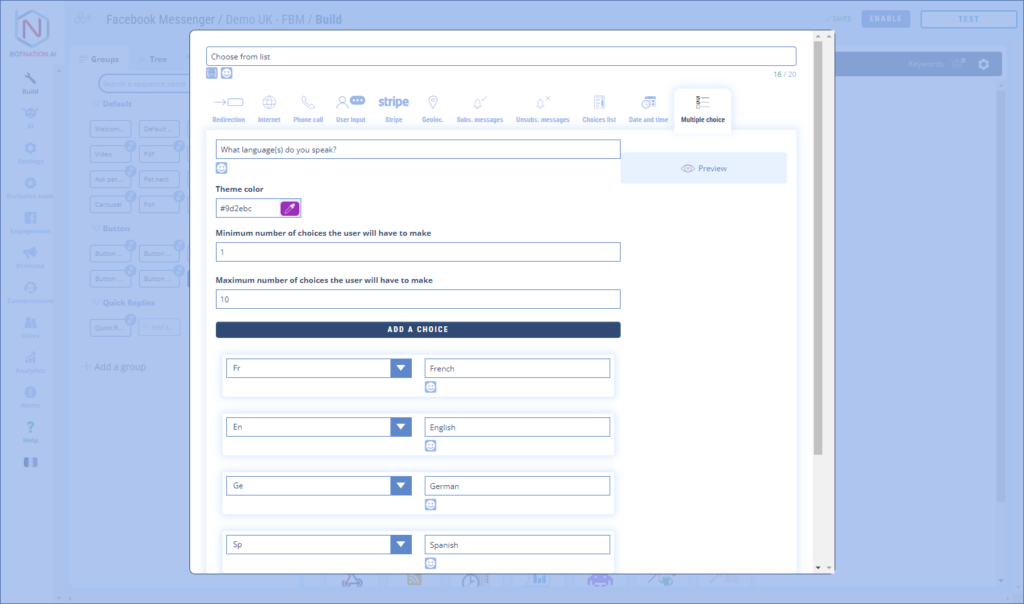
When the button is clicked, a popup window will open and display the different choices to be checked as well as a Validation button.
There is no limit to the number of choices or to the number of characters of the choices.
Each choice is associated with a different variable that will take the value 1 if it is checked or 0 if it is not.
The parameters of this action are :
- Text displayed in the title of the popup
- Button color
- Minimum number of choices the user will have to make
- Maximum number of choices the user will have to make
- The choices and their variables
- Redirection sequence
- Popup type: small, large or full screen
See the article: The multiple choice list (Messenger)
2. Options
A – By clicking on the “A/B +” icon, you can rotate different versions of your feature using A/B Testing.
See the article: A/B Testing and Machine Learning
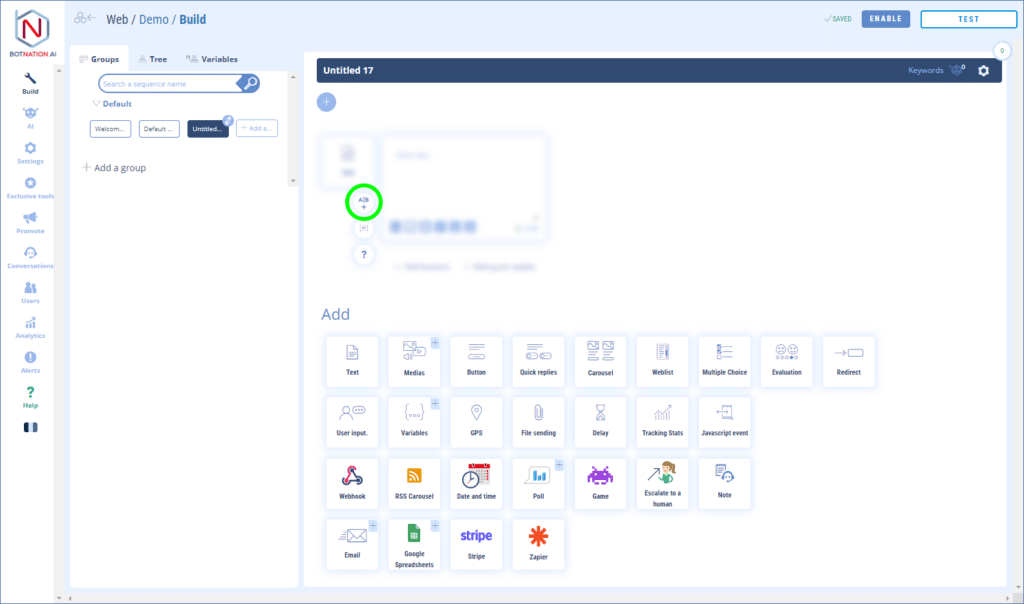
B – You can leave a comment to your collaborators about this feature by clicking on the icon (see below).
See the article: Add Comments

C – By clicking on the “?” », the online help will open on the article corresponding to this feature.

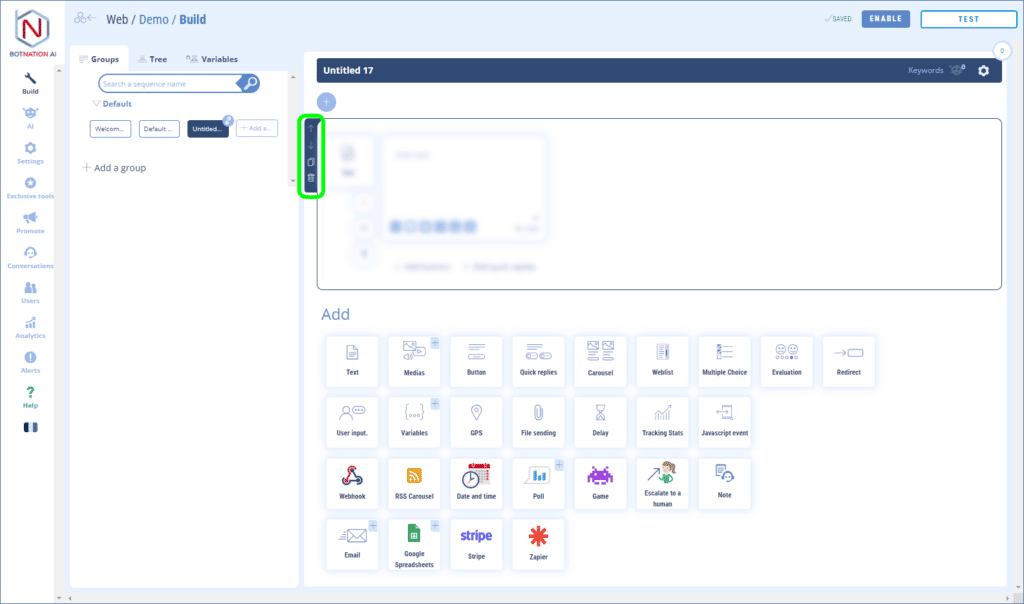
D – You can duplicate, delete or move this feature using the icons that appear on hover.